Screen Recording
 Screenshot Capture
 GIF Capture
 File Sharing & Collaboration
 Jumpshare AI
Collaborating through video has become quite the norm in the past two years, with Zoom making its niche as one of the premier video conference software available to people for free. One of the reasons it’s so popular is how well it attempts to add the human touch – literally – to its video-messaging features via real-time on-screen annotations and the Zoom Whiteboard.
Using annotations while presenting on Zoom makes it easier for your viewers to understand you and also helps you hold their attention. It allows you to present with both visual and verbal cues, helping your viewers follow you easily, and taking away some of the vexations of communicating through a screen. The combo of sharing your screen, annotating your screen, and recording the call as a video allows teams to collaborate remotely and brainstorm efficiently.
Here are a few ways you can use Zoom annotation during a meeting. We also explore how you can record a Zoom meeting while it is still in progress, annotating it and sharing it in seconds using Jumpshare.
Table of Contents
- How to Annotate Zoom Meetings
- How to Enable or Disable Annotation for Other Participants
- How to Record and Annotate Zoom Meetings with Jumpshare
How to Annotate Zoom Meetings
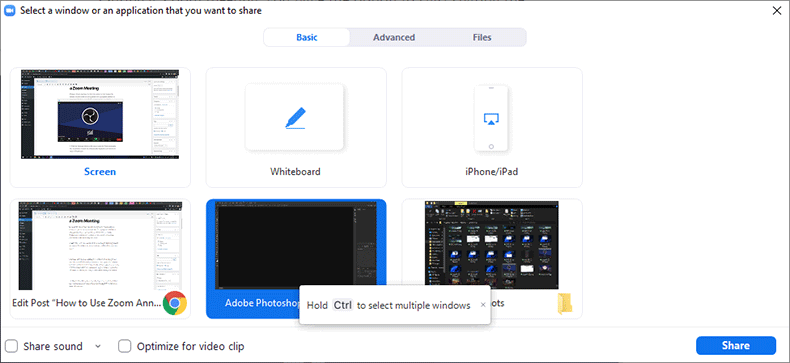
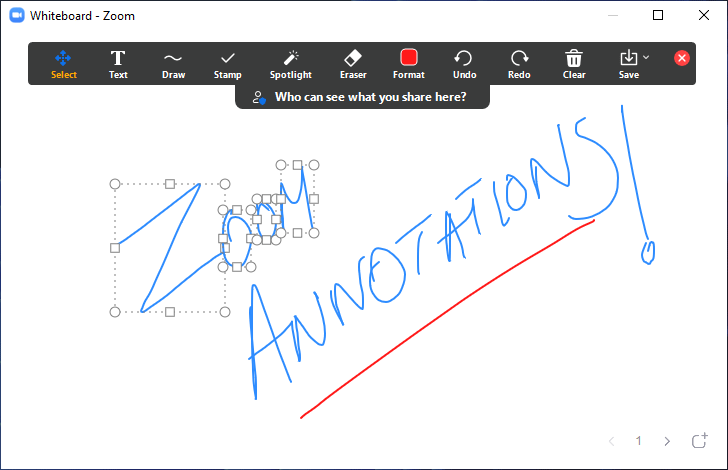
During a Zoom meeting, you have the option to start sharing the entirety of your screen or just a portion of it, select windows or running applications, a specific file on your system, or a blank Whiteboard on which you can draw as you present so that other participants understand your point better.
1. Select the Share Screen option from the meeting controls displayed at the bottom. If you don’t see the option here, you’ll find it in the More menu.

2. Decide how you want to share your screen from the dialogue box that follows, and hit Share. If you choose to share select windows, only those windows will ever be shared with your participants, even if you switch to other windows or applications on your system. A green bar will appear on the top, notifying you that you’re sharing your screen.
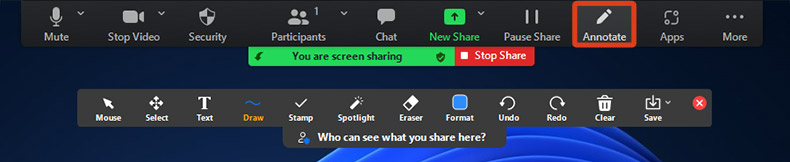
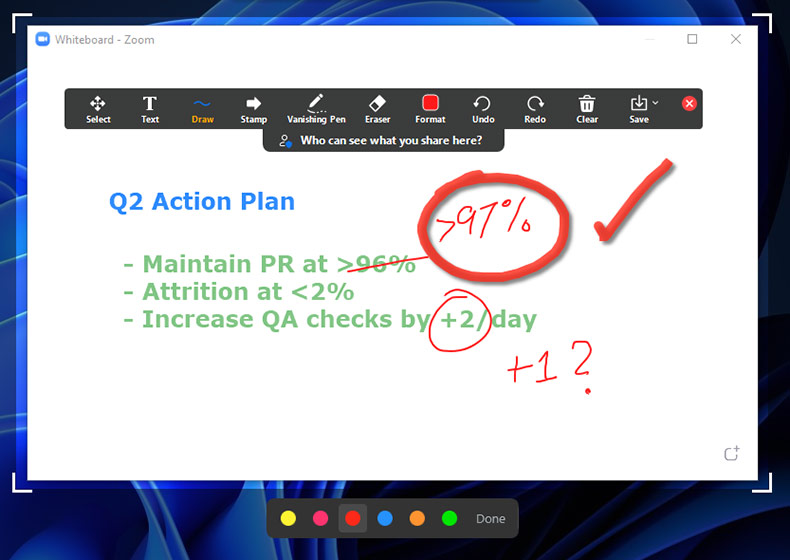
3. Find the Annotate button at the top to open the Zoom annotation bar. Annotation controls are automatically displayed if you choose to share a Whiteboard.
If another attendee is presenting, you can annotate over their shared screen by selecting View Options > Annotate from the top.

You’ll get a variety of tools to choose from in the annotation toolbar, including:
- Mouse closes annotation tools and selects your mouse pointer.
- Select lets you select annotations you’ve added to the screen.
- Text lets you write text on the screen.
- Draw allows you to add shapes, lines, and arrows on-screen, and allows you to highlight parts of your screen.
- Stamp lets you choose between icons like hearts and arrows as stamps.
- Spotlight tracks your mouse pointer and clicks across the screen.
- Eraser lets you erase parts of your drawing.
- Format allows you to change the thickness of your lines or the size of your text.
- Undo and Redo let you undo or redo your drawing strokes.
- Clear completely clears your screen of annotations.
- Save saves your shared screen/whiteboard as a PNG or a PDF locally on your system.
4. If you want to stop sharing your screen, click on the red Stop Share button at the top of your screen.
Note that there are fewer options in the Zoom apps for iPhone and Android smartphones, though the ones that are available work exactly as their desktop and tablet counterparts. You can reveal these options by tapping anywhere on the screen while you or someone else is presenting and selecting the pencil icon at the bottom right of the resulting overlay.
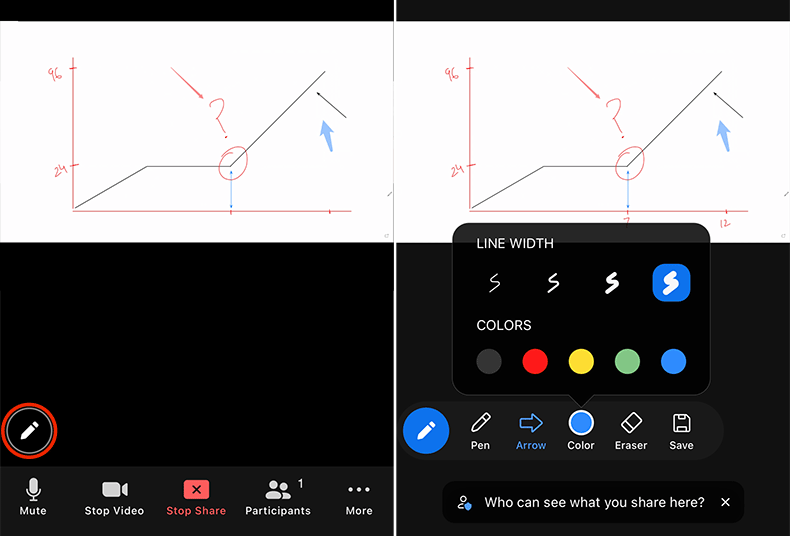
Additionally, annotations are not possible on iOS when the entire screen is being shared as opposed to content from one of the apps listed in the Share Content menu.
How to Enable or Disable Annotation for Other Participants
When you are presenting or screen sharing, whether as the host or a participant, by default, others are allowed to annotate alongside you. Zoom even displays the names of attendees alongside their annotations. You may, however, choose to prevent others from annotating your presentation or their names from being displayed alongside their annotations.
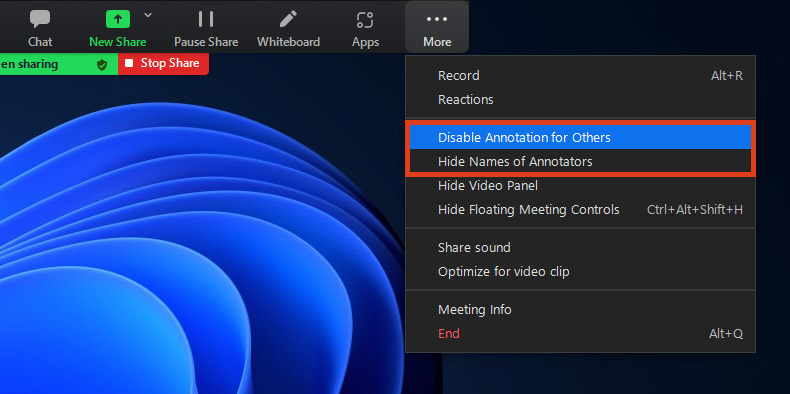
1. While screen sharing, select More from the floating meeting controls.
2. From the menu that pops up, you can choose to Disable/Enable Annotations for Others or Hide/Show Names of Annotators.
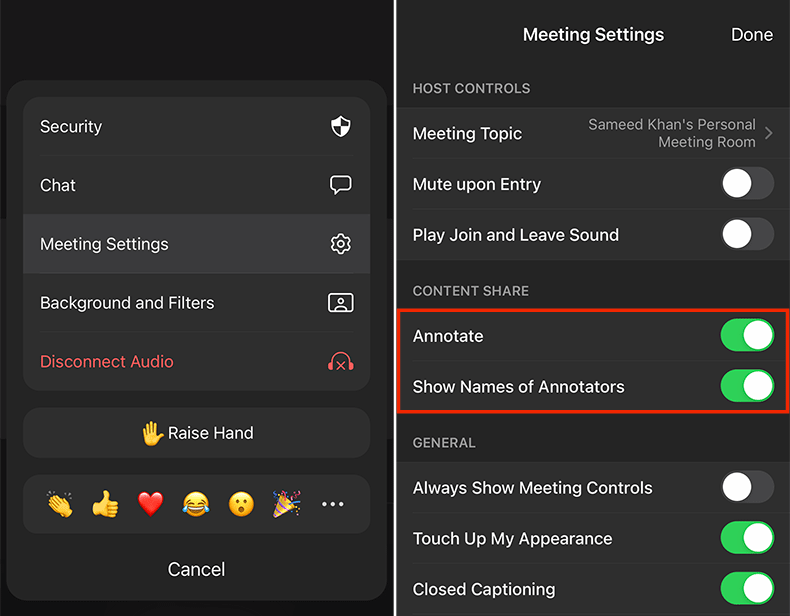
On the iOS and Android apps, you’ll find the same two options behind More > Meeting Settings under Content Share provided you are in the process of sharing content.
Note that the host reserves the right to prevent participants from sharing their screens.
How to Record and Annotate Zoom Meetings with Jumpshare
While Zoom allows you to save meetings as videos, you can use Jumpshare to record a meeting in progress and quickly annotate it before sharing it via link or email. Suppose you’re a participant in the meeting and you need to share something quickly with someone, like a designer, outside the meeting. Instead of waiting for the meeting to end so that you can share a recording, you can record the pertinent parts of the meeting via Jumpshare and then share them immediately – quick, efficient, and deviously simple virtual collaboration.
You can record and annotate Zoom meetings with Jumpshare’s video recorder in a few simple steps:
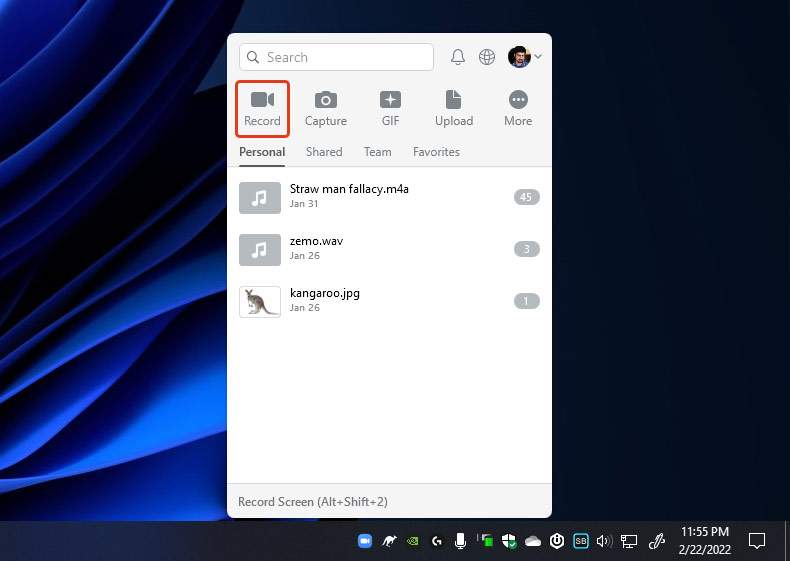
1. Click on the Jumpshare icon to open the Jumpshare window.
2. Click on the Record icon. By default, the Jumpshare hot-key to record video is Alt+Shift+2 in Windows and Cmd+Shift+6 on Mac.
3. Customize the size of the recording window and cycle between your webcam and audio options.
4. Once everything is in order, click Record.
5. When the recording starts, click on the Draw button in the bottom bar. This will allow you to draw over the recording screen in real-time, switching between a selection of colors on the fly. Once you hit Done, the screen will be cleared of all annotations.
6. When you’re done, hit Finish.
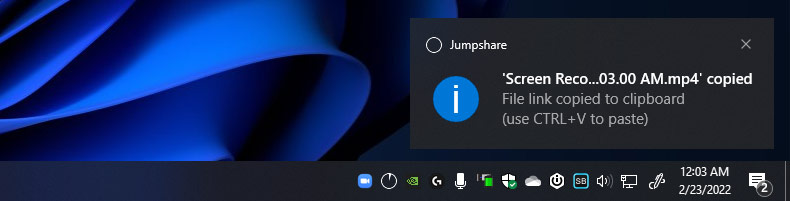
The second you hit Finish on your recording, Jumpshare will automatically upload the video to your Personal library and copy the video link to your clipboard for quick sharing. You can paste it anywhere, or share it via email, along with a message.