Screen Recording
 Screenshot Capture
 GIF Capture
 File Sharing & Collaboration
 Jumpshare AI

Video is intrinsically one of the most engaging ways to consume information, and for use cases beyond conventional content, professionals have been employing interactive elements to turn that engagement into action.
Particularly useful for product demos, sales presentations, or educational content, interactive elements can turn a one-way viewing experience into an opportunity to generate leads, redirect traffic, and collect feedback.
In this guide, we’ll show you how to add such interactive elements to your videos using Jumpshare.
Benefits of Interactive Videos
Interactive videos create opportunities for viewers to engage with your content rather than simply consume it. Compared to traditional videos, they can help you:
- Increase viewer engagement
- Guide viewers to product pages, booking pages, or signup forms
- Generate leads without sending viewers to another page
- Help viewers navigate longer videos easily
- Learn how viewers interact with your content with analytics
- Directly address queries and feedback
How to Create Interactive Videos with Jumpshare
Not only does Jumpshare make it incredibly easy to create polished, engaging videos using its powerful screen recorder, it also offers several tools to turn these recordings, or any other video, into an interactive experience.
Add a CTA (Call-To-Action) Button
CTA (call-to-action) buttons give viewers a clear next step while they’re already engaged with your content. Jumpshare lets you add CTA buttons on top of your videos in a few easy steps:
- Open any video from your Jumpshare library.
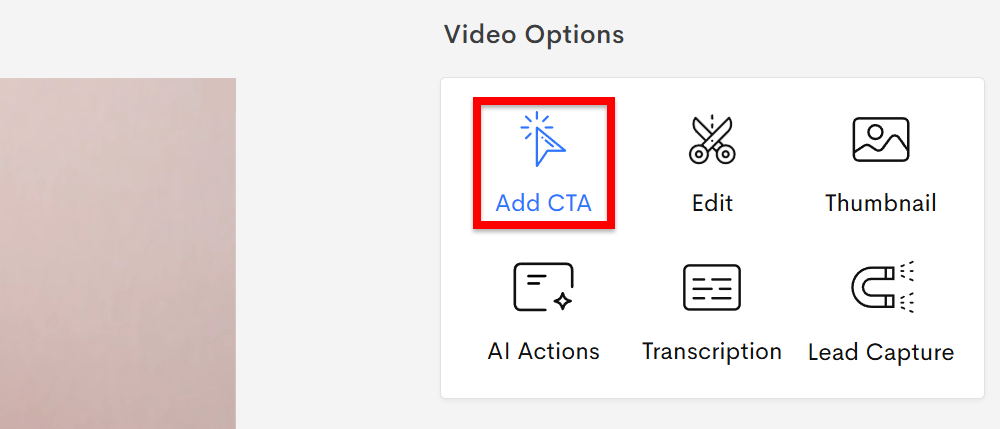
- Select the Add CTA option from the right sidebar.
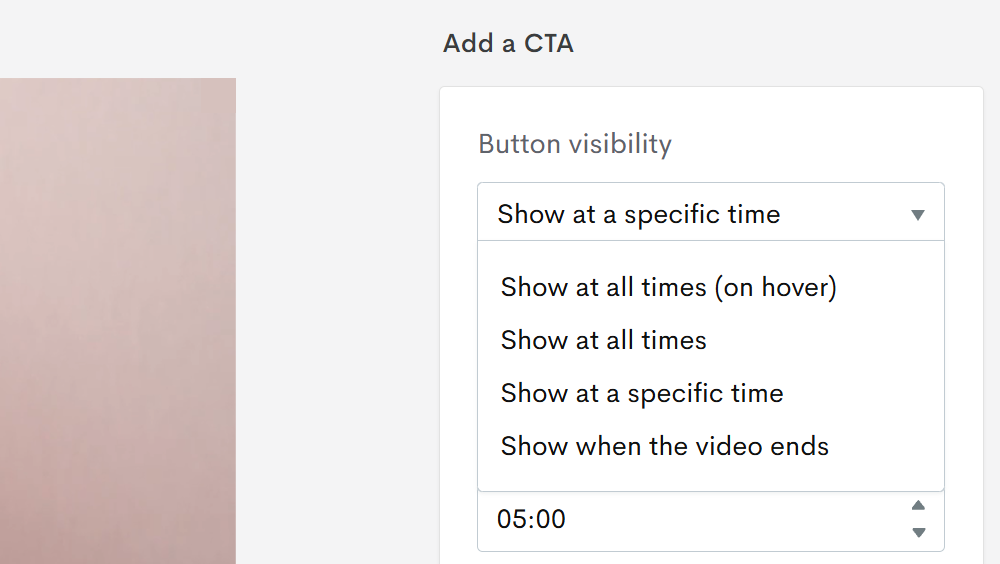
- Choose when the CTA button is displayed over the video, then enter the CTA link and text.
- Customize the button’s appearance. You can set button and text colors of your choice, change the button’s position over the video, choose to show your profile photo to the left of the text, and have the button pulse for a few seconds when it appears to grab the user’s attention instantly.
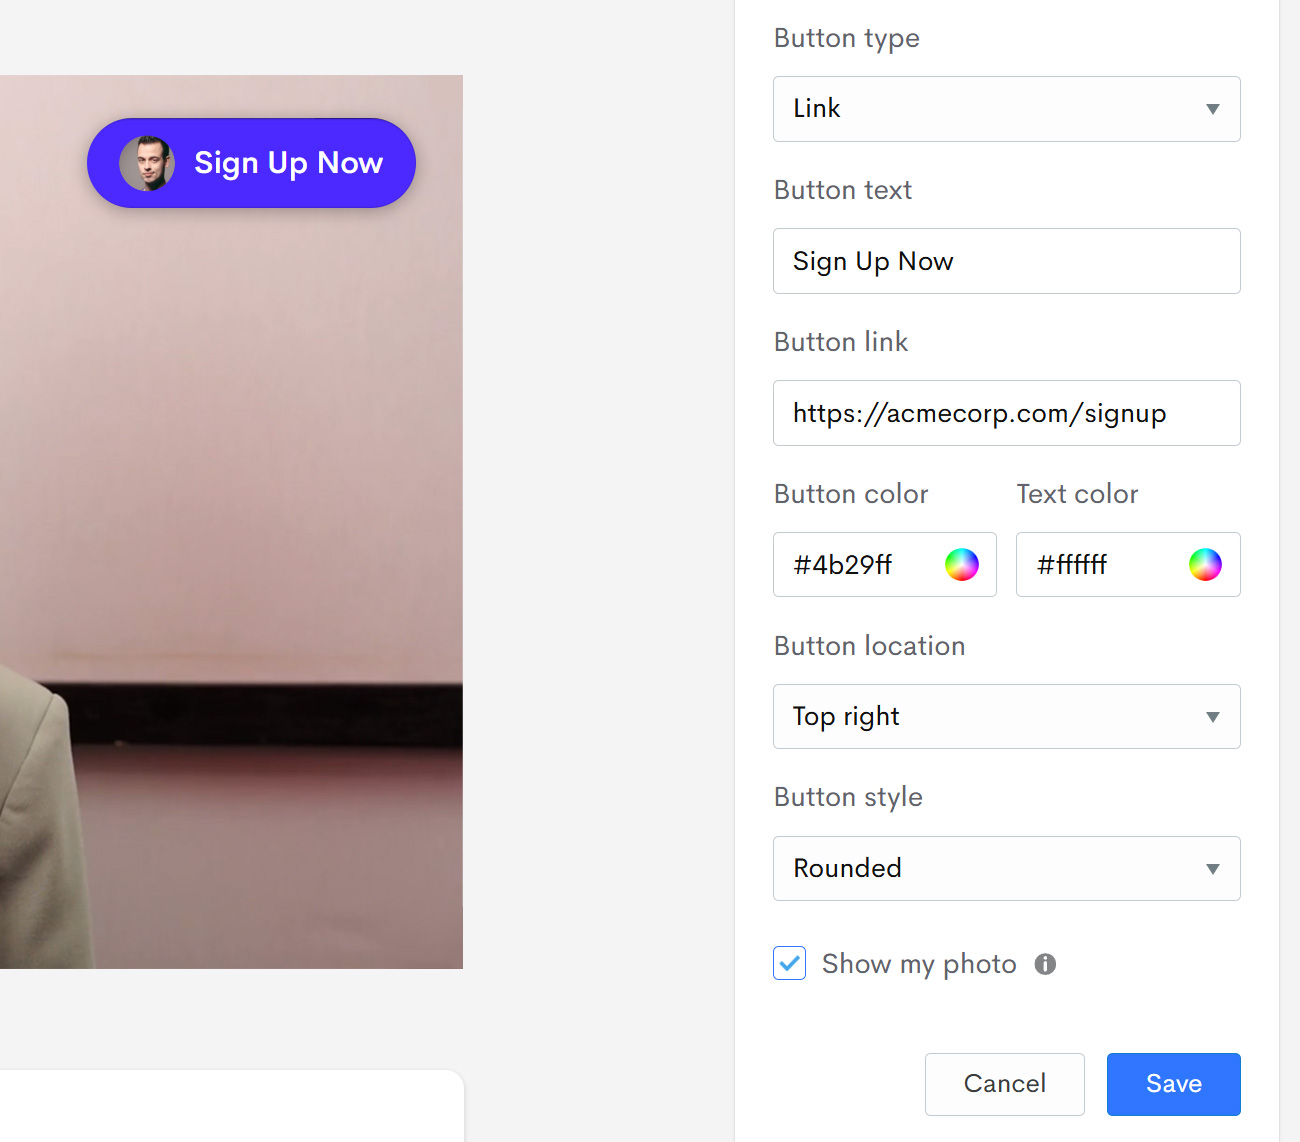
- Hit the Save button at the bottom when you’re done.
CTA buttons are ideal for directing viewers to product pages, appointment schedulers, downloadable resources, support portals, and contact forms.
Add a Lead Capture Form
Instead of asking viewers to visit a separate landing page to share their info, Jumpshare lets you collect leads directly from within the video. Lead capture forms can appear before the video begins, during playback, or after the video ends, and are customizable.
Here’s how to add a lead capture form to a video with Jumpshare:
- Open a video from your Jumpshare library.
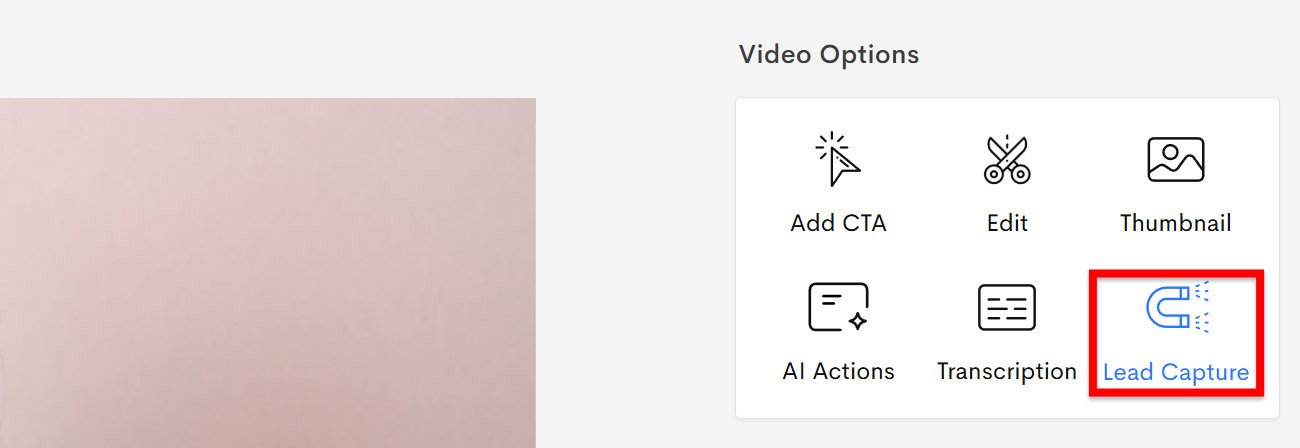
- Click the Lead Capture option in the right sidebar.
- Choose when the lead form appears over the video – at the beginning, after the video ends, or at a specific time in between.
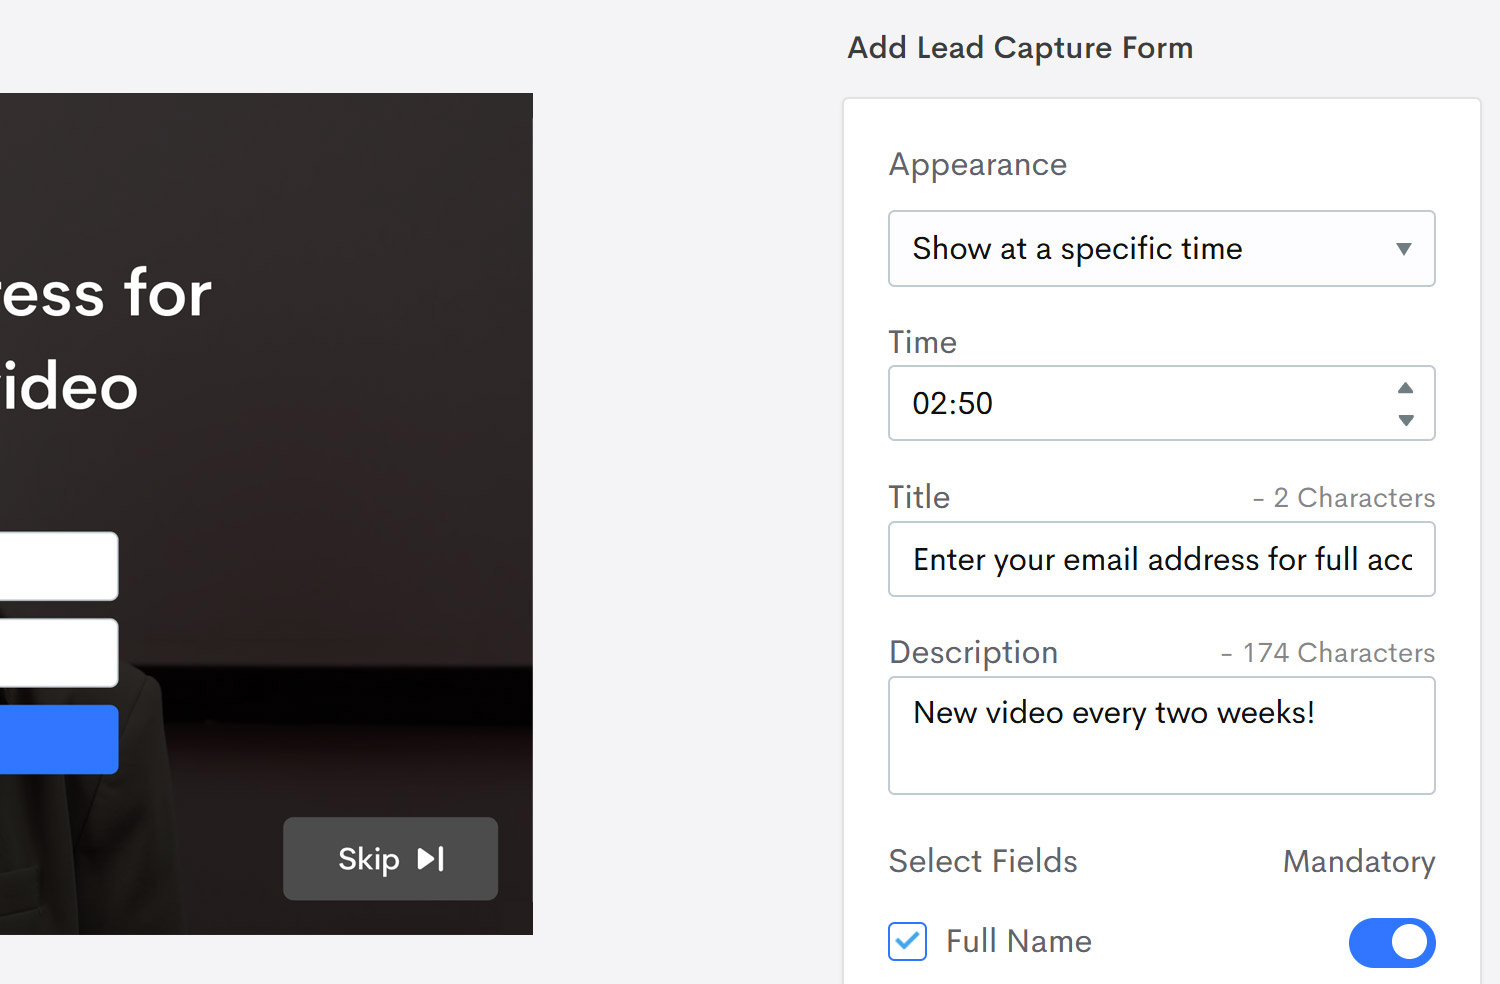
- Enter a title and description for the form, then choose the fields that will be displayed in the form – Name, Email Address, and Phone Number.
- Enter the text for the form submission button and customize the button’s appearance.
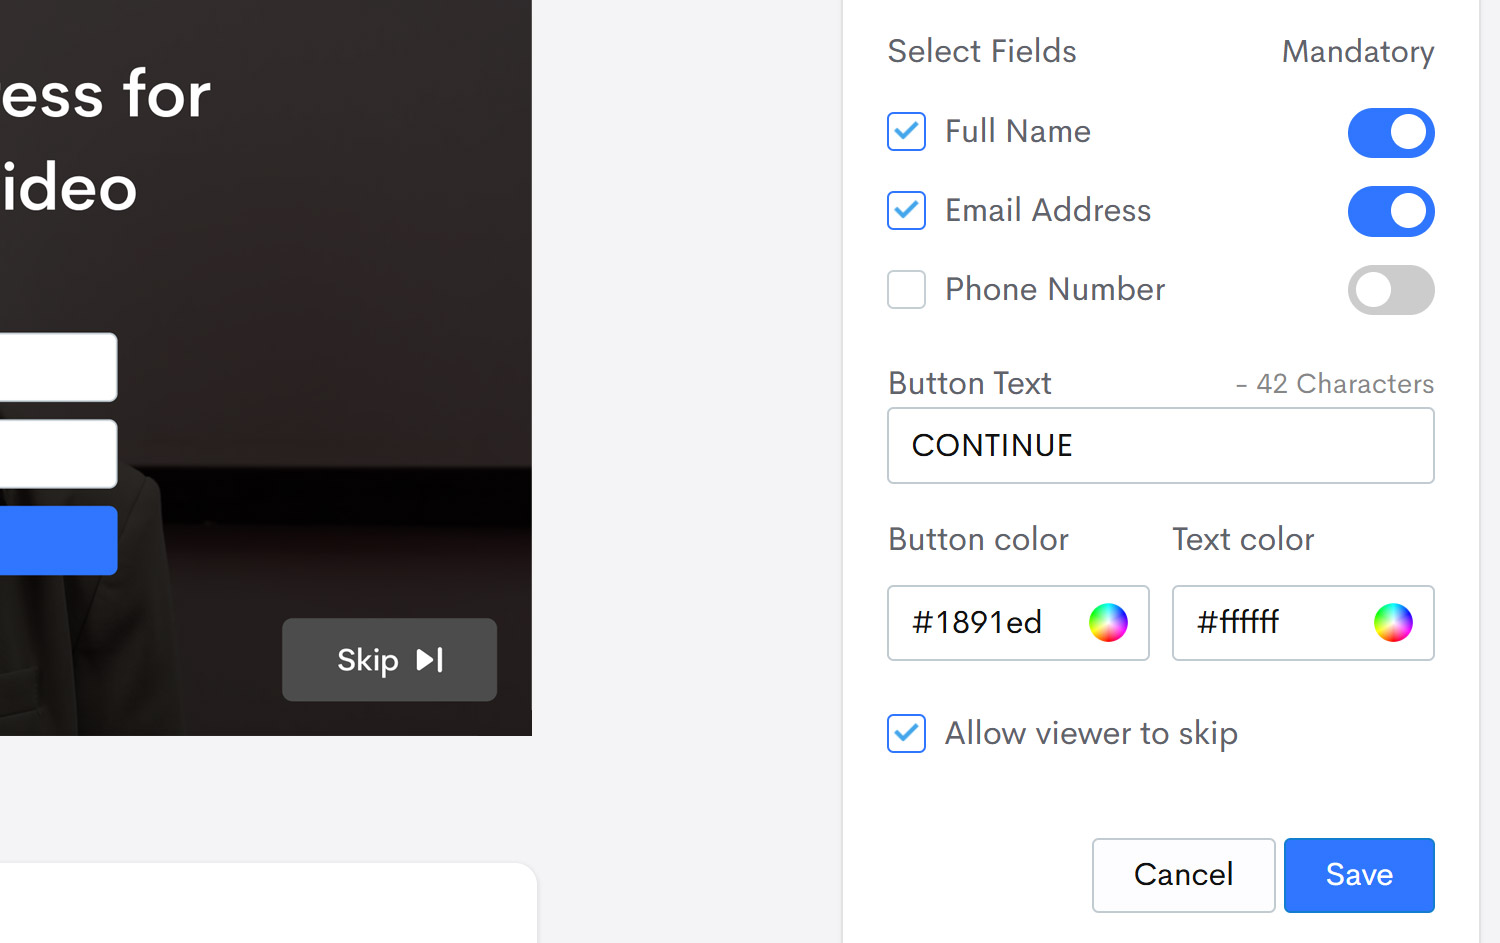
- Choose whether the viewer should be allowed to skip the form.
- Click Save to add the form to your video.

Because viewers never have to leave the video, lead generation feels like a natural part of the viewing experience rather than an interruption, which increases chances of conversion.
Organize Longer Videos with Chapters
Longer videos are often easier to navigate when viewers can jump directly to the sections that interest them.
Jumpshare uses AI to automatically generate chapters for your videos, making it easier for viewers to find the information they’re looking for without skimming through the entire length of a video.
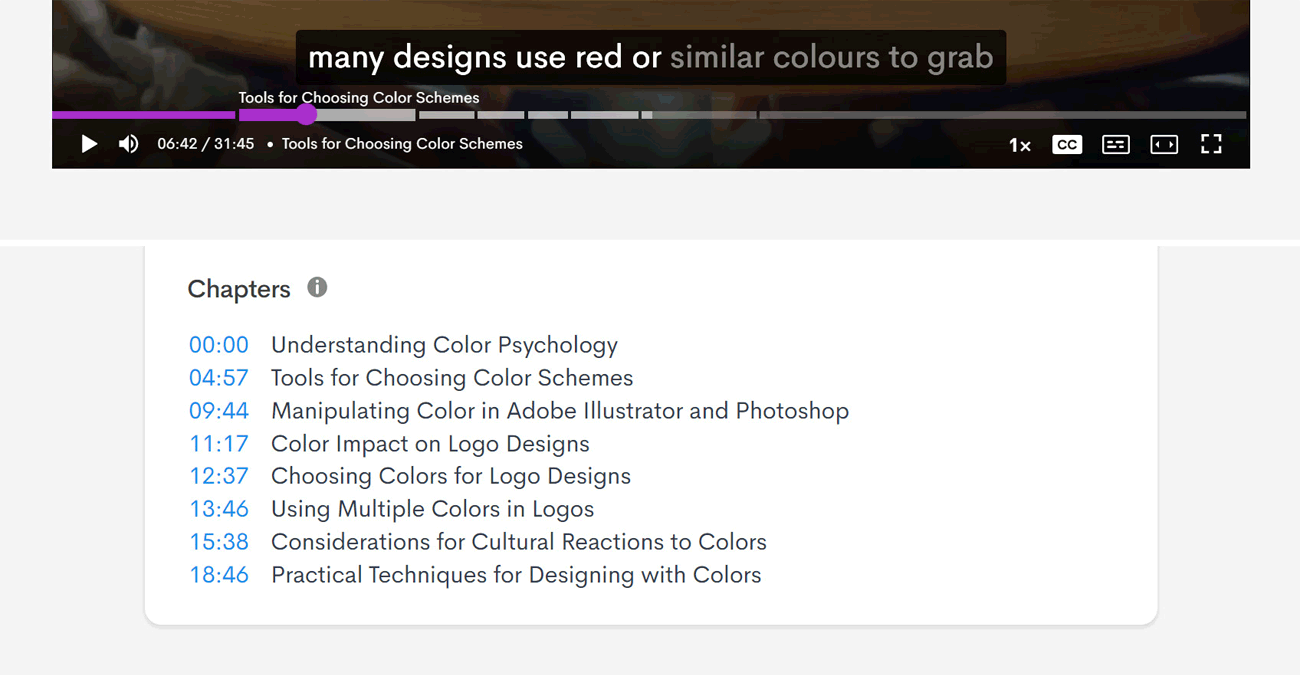
This makes longer tutorials, webinars, onboarding videos, and presentations more accessible. You can, if needed, edit these automatically generated chapters or manually add your own by clicking anywhere within the Chapters field beneath one of your videos.
Chapters appear both beneath the video and over the video player’s seek bar.
Encourage Collaboration with Comments
Interactive videos aren’t just about conversions; they’re also a powerful collaboration tool. Jumpshare allows recipients to leave timestamped, annotated comments directly on a video, making it easy to ask questions and provide feedback with clarity without switching to another app.
Any comment you add to a video automatically includes the current timestamp. To add markup on top of a video:
- Move to the point in the video you want to annotate.
- Click on the paintbrush (drawing tools) icon beside the comment field in the right sidebar. This will automatically pause the video if it’s still playing.
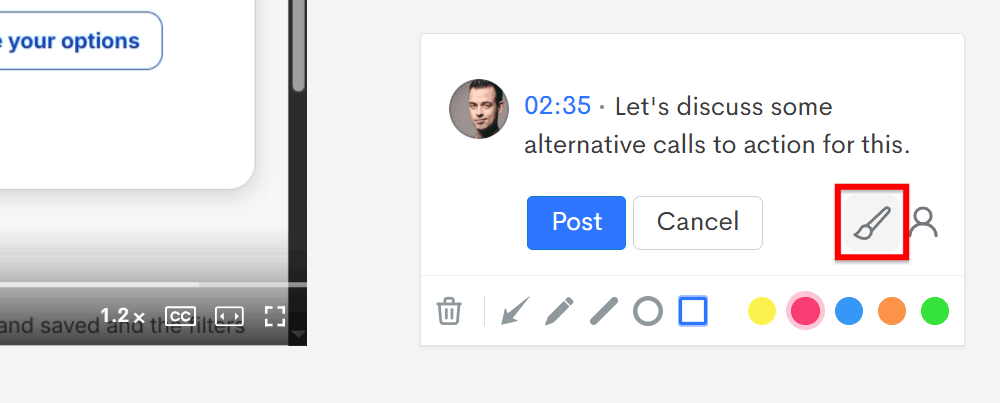
- Pick a drawing tool and color.
- Click and drag over the video to add your annotation.
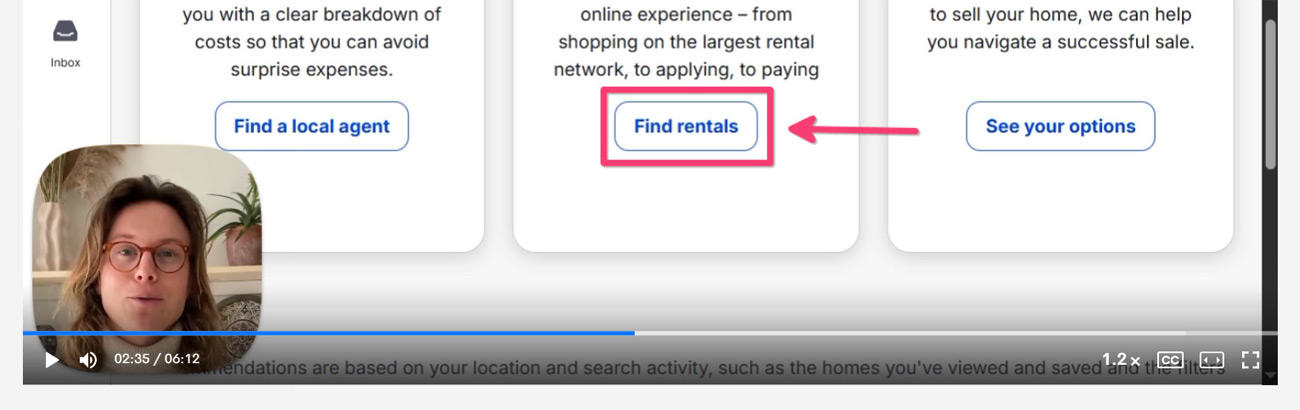
- Enter a comment to explain your annotation and hit Post.
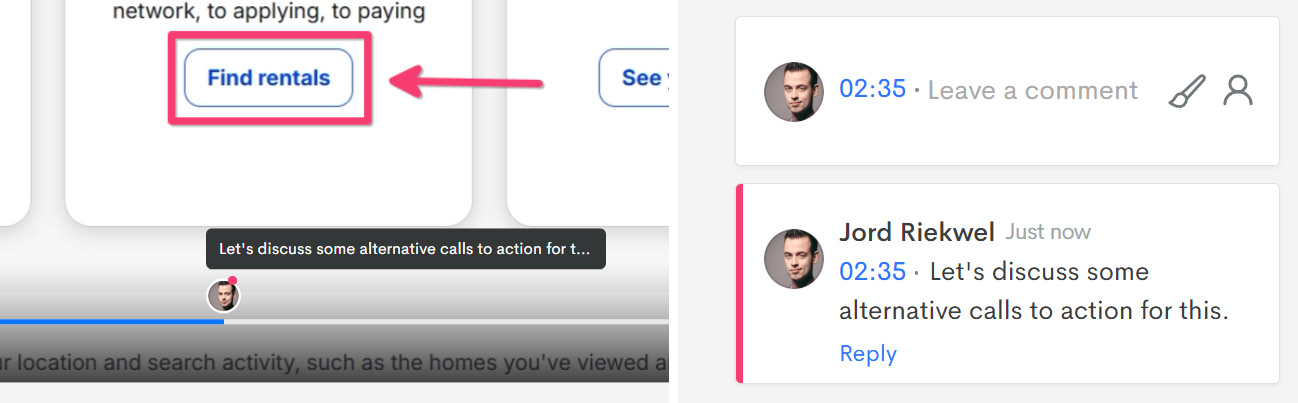
Viewers can see your annotation by clicking the timestamp in your comment or by pausing the video at, or a few seconds after, the referenced timestamp.
Why Use Jumpshare for Interactive Videos?
Jumpshare brings together everything you need to create, share, and optimize interactive videos in a single platform.
Beyond adding interactive elements, you can also:
- Record your screen, webcam, or both
- Share videos anywhere in seconds with a link
- Generate AI-powered transcripts, captions, titles, summaries, and chapters
- Generate documents and tasks from videos with a single click
- Customize the video player with your branding
- Track viewer engagement with advanced analytics
- Collect feedback with timestamped comments and video markups
With this set of features, you can go beyond just creating and sharing to offering viewing experiences that encourage viewers to take action.