Screen Recording
 Screenshot Capture
 GIF Capture
 File Sharing & Collaboration
 Jumpshare AI
A shabbily captured screenshot might be good enough to share with a friend but the same may not be acceptable for a client.
Fortunately, there are tools out there meant to help you take screenshots fit to be shared anywhere. The powerful Background Options tool in Jumpshare’s very own screenshot annotation toolset is a prime example. In a few simple clicks, this feature can add a beautiful background to your screengrabs, turning even the most bland-looking shots into something you could proudly display on your product’s social media page.
Adding a Background to Screenshots
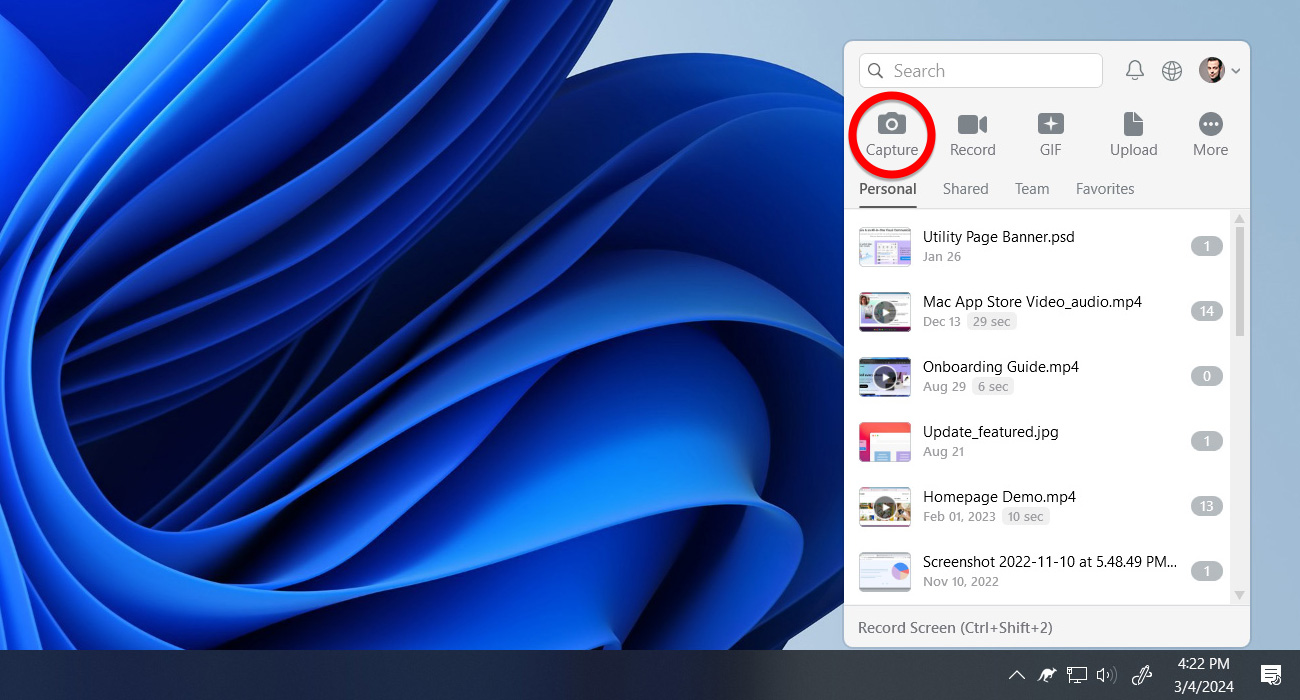
1. Launch Jumpshare and select Capture to take a screenshot. When you’re done, your screenshot will be opened within the annotation window.
2. Click the icon at the extreme left of the tools at the top of the window to open the Background Options panel.
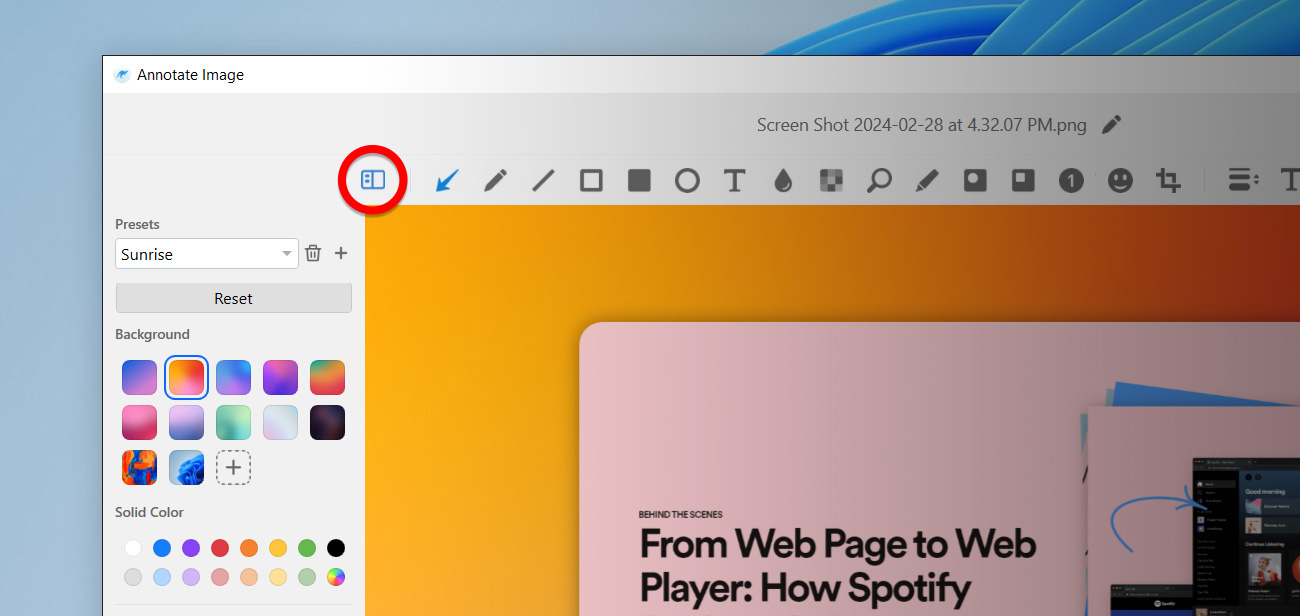
3. Pick your background. You may choose one of the 10 beautiful pre-made gradients from under the Background section, click the “+” icon to pick an image from your system, or search stock images from within the annotation window. You may also select a Solid Color from the section below.
4. Customize your background.

- Move the Padding slider to adjust the size of the background.
- Move the Inset slider to adjust the size of the border around your screenshot. The color of this border is set automatically based on the content of your screenshot, specifically close to its edges. For example, if there is one solid color around the edges of your screenshot, the border will be the same color.
- Move the Rounded slider to make the edges of the screenshot’s border more or less curved.
- Move the Shadow slider to adjust the size of the shadow that appears under the screenshot.
5. Enable the Auto-balance option to intelligently remove any empty areas or fluff from your screenshot and draw focus to what’s important.

6. Choose where on the background you want your screenshot to appear by selecting one of the 9 options under Alignment.

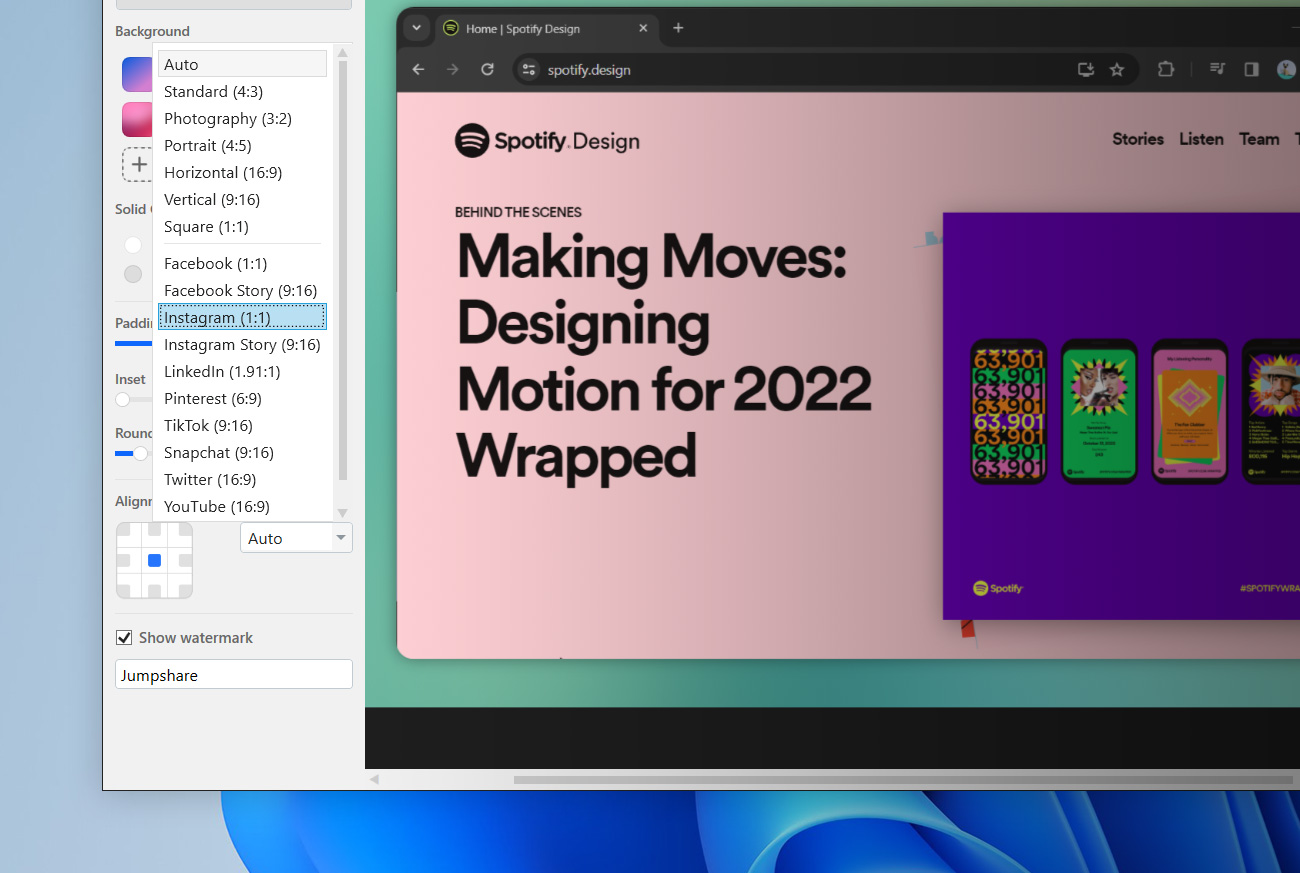
7. Open up the Ratio drop-down menu to change the aspect ratio of your screenshot so it may better suit your target platform. For example, if you’re going to share your screenshot on Instagram, you may want to select the option by the same name or the Square (1:1) option.
8. Finally, you may choose to add your name or branding to the screenshot by typing it out in the Watermark field.
If you’re unhappy with the result and want to start over, simply hit the Reset button at the top. If you’re ready to share, hit the Upload button to save the screenshot to your Jumpshare library and have its link automatically copied to your clipboard. You may now paste this link anywhere you wish to share the screenshot.
Saving and Applying Background Presets
If you love your spruced-up new screenshot and could see yourself using the same background for future shots, consider saving your settings as a preset before you hit that Upload button. Here’s what you need to do to save a new preset.
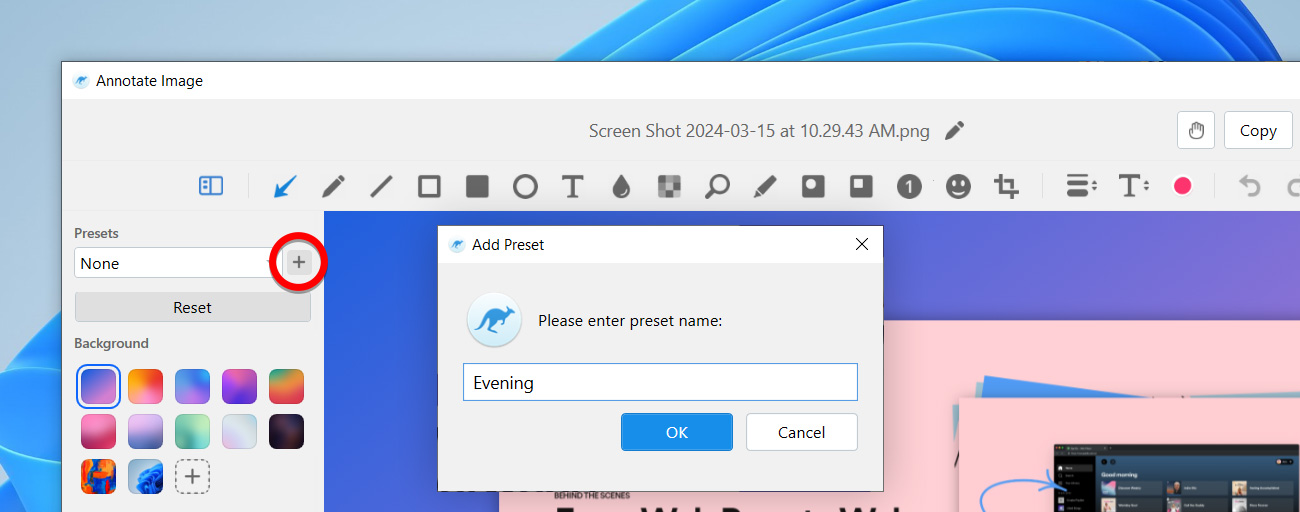
1. After you’ve picked a background and made all required changes to it within the Background Options panel, click the “+” icon next to the Presets drop-down menu.
2. Enter a name for your preset and click OK.
3. For future screenshots, simply open the Presets drop-down and select your saved preset from the list.
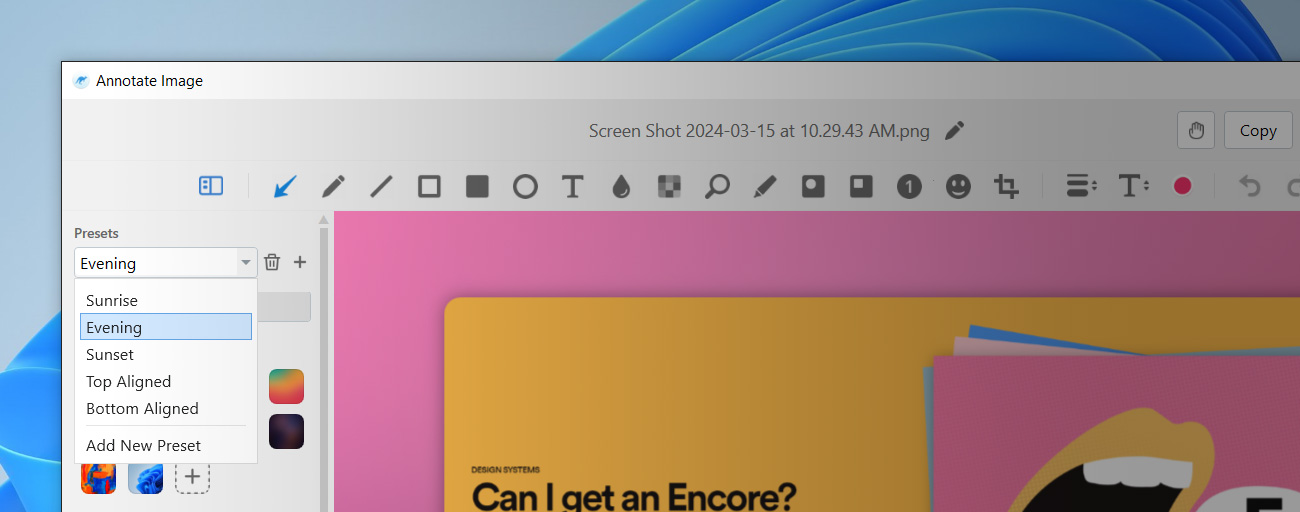
To delete any preset you’ve saved, select it from the drop-down and hit the delete icon to the right.