Screen Recording
 Screenshot Capture
 GIF Capture
 File Sharing & Collaboration
 Jumpshare AI

Starting today, we have migrated all jmp.sh short urls from http to https. Now all share links at Jumpshare support https communication protocol for enhanced security. If you’re on a Plus or Business plan and using a custom domain to share your links, you can set up https using Cloudflare.
After you’ve successfully set up your custom domain, the next step is to visit Cloudflare and set up your free account (choose the Free plan). As part of setting up your account, Cloudflare will ask you to enter the domain for which you want to set up https, here you need to enter your Apex domain (example.com domain) and they will automatically fetch the records for you. If you set up the subdomain, the CNAME record will be fetched automatically, and if you set up the Apex domain, then the A record will be fetched automatically. So the process is pretty straightforward.

An example of CNAME record fetched by Cloudflare
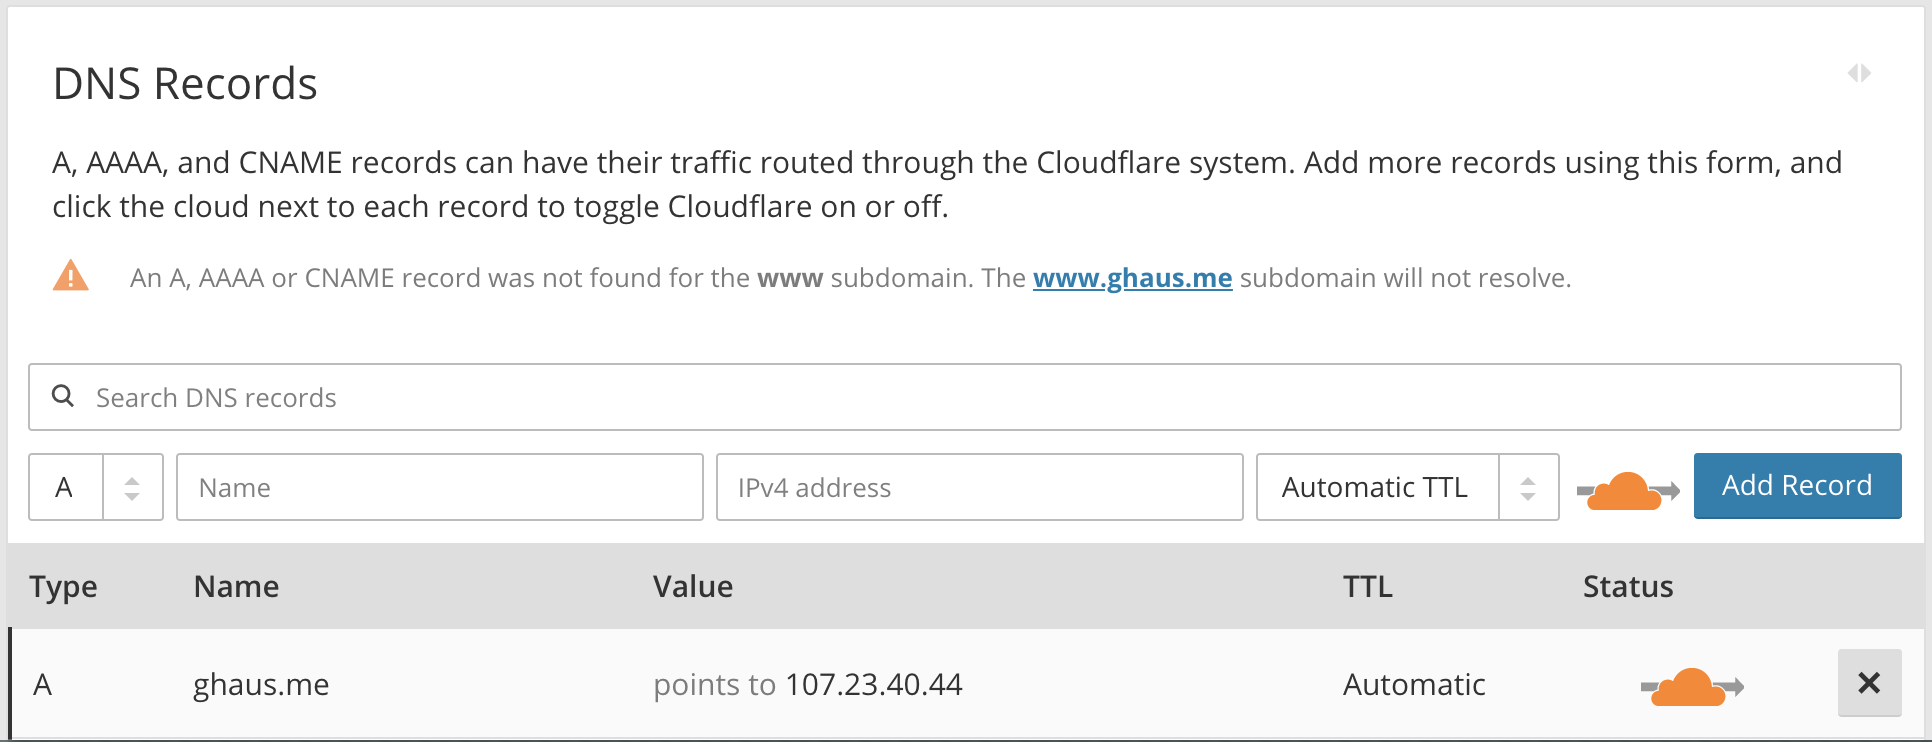
An example of A record fetched by Cloudflare
If the record is not fetched automatically, then you can create a CNAME record (if you want to set up subdomain) or an A record (if you want to set up Apex domain) yourself.
Next, you need to point your domain’s authoritative DNS servers, which are also referred to as nameservers, to Cloudflare. Once your website is using the nameservers provided by Cloudflare, allow a few hours for the change to be processed.
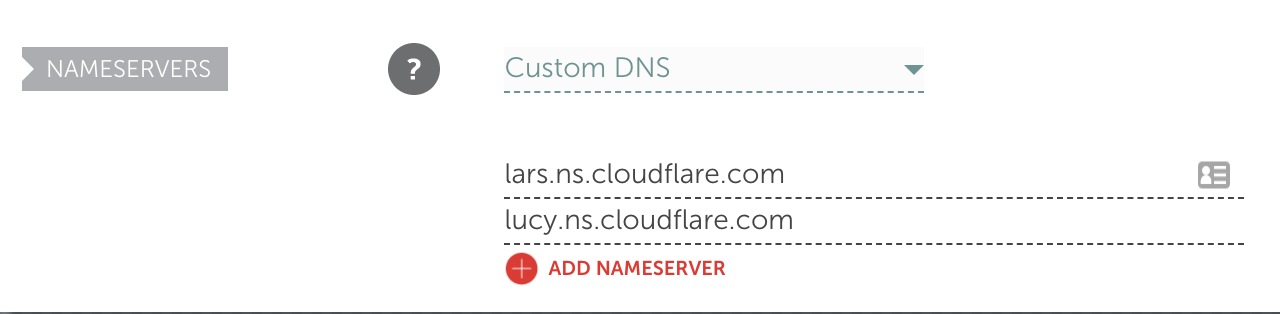
Cloudflare nameservers entered in domain registrar Namecheap.com
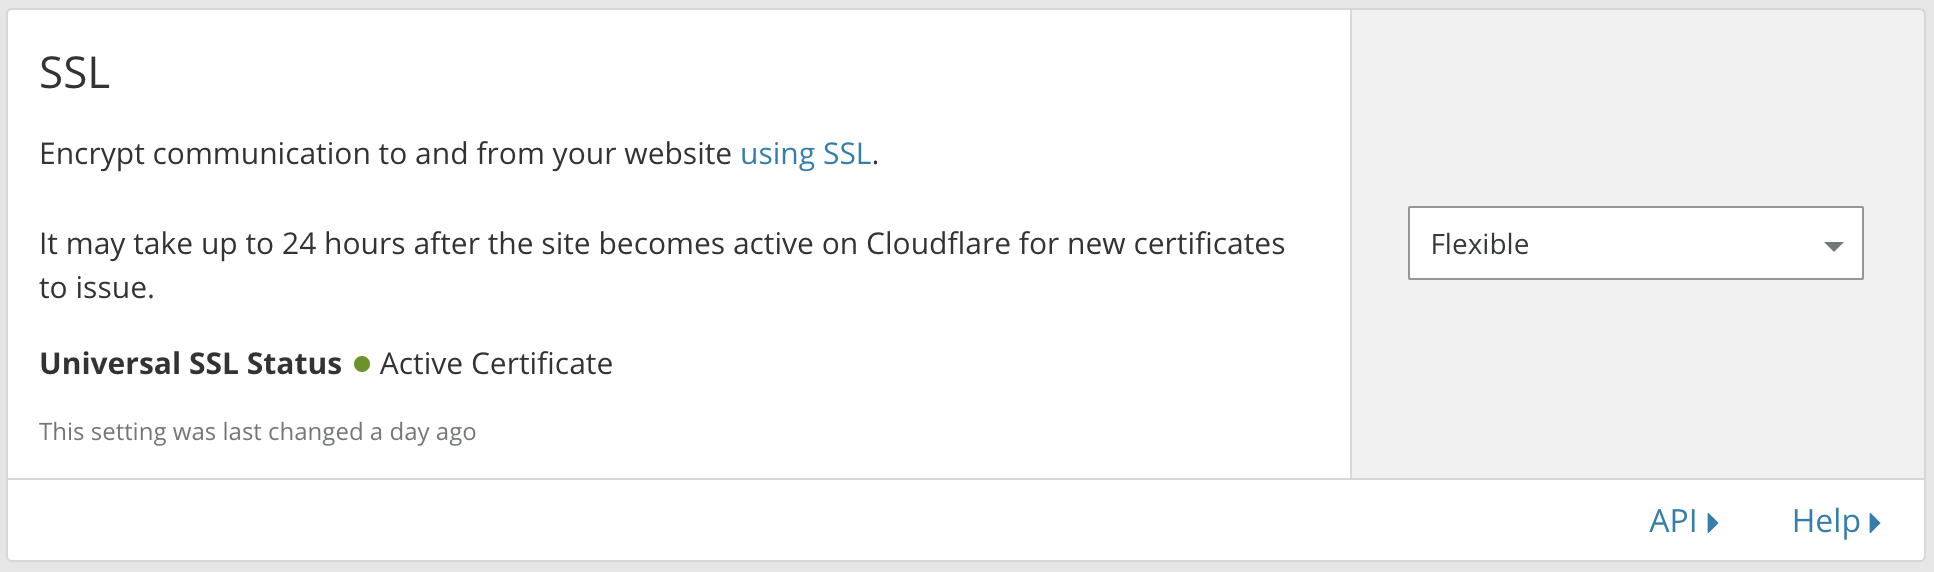
In Cloudflare dashboard, head to the Crypto tab and select “Flexible” SSL certificate. If Flexible doesn’t work, you can try “Full” SSL Certificate.
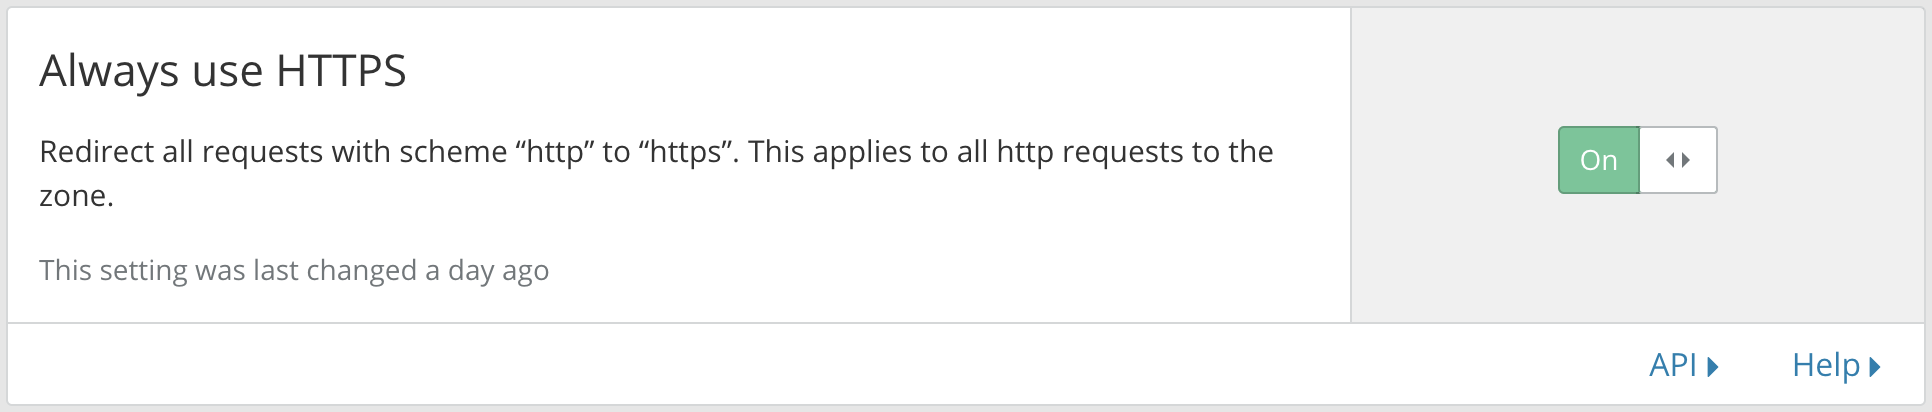
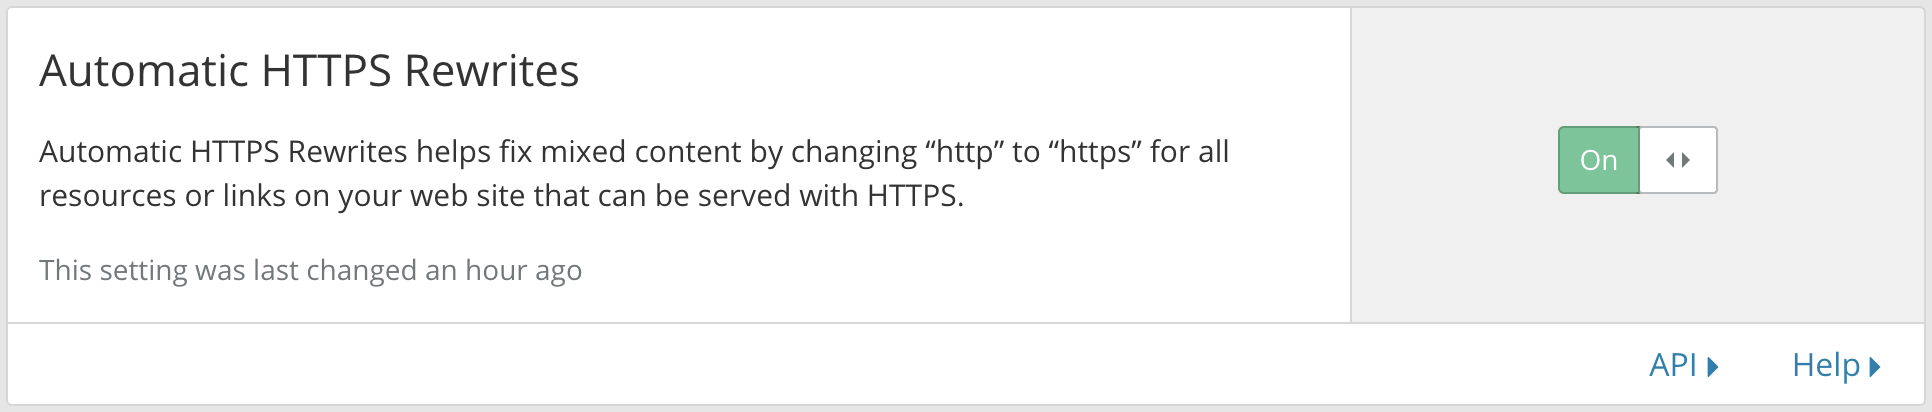
When you copy a link to any file from Jumpshare, it will still be copied as http, so the next step is to redirect http to https for your custom domain. Once this is enabled, https will be forced on your links. In the same Crypto tab, scroll down and enable both “Always use HTTPS” and “Automatic HTTPS Rewrites” options.
That’s it!