Screen Recording
 Screenshot Capture
 GIF Capture
 File Sharing & Collaboration
 Jumpshare AI

Video lectures are increasingly becoming the go-to method for knowledge sharing on the internet. They don’t require you to show up for classes, they possess longevity, and are easily scalable.
You could be sipping pina coladas in the Bahamas while learners purchase and study your recorded lectures – that’s money in the bank and more days off for you.
When it comes to creating recorded courses, there are several kinds of video lectures and recorded courses options to choose from. But so far, the most popular ones feature the following elements:
- Slides/presentation
- Presence of the instructor via webcam and audio
Another common element of such courses are the screen recording tools. The wrong kind of tools can take money from your pocket, and worst of all, waste your time and effort. Not to worry, however, Jumpshare has enabled thousands of people to screen record their courses, and we’re going to tell you how to do that.
While video-based, recorded courses may look a little intimidating to make as a first-timer, not much has to change from a regular Zoom class. In fact, owing to the nature of video lectures, they only add improvements to the former and make for a more enhanced teaching experience. And so, without further ado, here’s how to screen record your online courses using Jumpshare:
Before course recording
If you’ve completed this step, you may skip to the next. But if you have no idea where to start, let’s first walk you through some crucial steps. This is before you start recording your course.
1 – Devise a course curriculumn
Before you set on creating slides for your course, make sure you’ve researched your learner persona, know their pain points, and can provide solutions through your course material. Figure out the progression of your lectures, and plan material and activities around them. Once you have devised the course curriculum, it’s time to move to the next step.
2 – Build your presentation
Separate all your lectures into different presentations or make one big presentation including your entire course material. Line them up by order, and then review the lineup in case you missed something.
Make sure they’re not text-heavy, include visuals to describe several concepts, even add trivia and memes to make content consumable. Preparing slides in advance can help you structure your lectures, cut out the unnecessary stuff, thus maximizing the learning experience.
3 – Write a rough script
If you were to read straight from slides in a recorded course, students would question the quality of your course and even your credibility. The solution to this, again, is planning in advance. Verbally rehearse your slides before recording them.
This will help you take notes, and also help you insert some discussion points or examples that can be explained without adding to slides. Take each lecture one by one, and try not to get overwhelmed.
During course recording
4 – Download Jumpshare for course recordings
Jumpshare is quite popular among the course creator community as a screen recording tool. It has all the features needed to make a stellar recorded course in record time.

While there is a forever free plan users can avail, its screen recording time is only 30 seconds long. In order to make optimal under-6 minute lecture videos each, course creators usually purchase the $8.5 Plus Plan at Jumpshare. With the plan they are able to unlock several great features, worry less about the technicalities, and focus more on course delivery.
Jumpshare is an easy download away. Install and run it on your computer. Sign in and test its functions. Then according to your convenience, upgrade your account according to your needs.
5 – Sit in a quiet, comfortable environment
A great deal of good and bad recorded courses do the rounds online. However, we want your course to be great. So be mindful of your environment. There are several factors that can deteriorate the quality of your recorded course.
Like noise, for instance. Be sure to sit in a secluded spot of your residence or office, away from distractions like people talking and horns beeping in the background. Not only will you be distracted, but your students may also get irritated and confused.
Moreover, be certain about your surroundings. You don’t want to sit in front of a wall with a rock band poster pasted in the back. Not only would that be distracting, but your students won’t take you seriously and your professionalism may come into question. Instead choose a light, plain wall to sit in front of without any clutter showing in the cam.
Also make sure that you and your device (laptop, desktop) are at level with you, and that you’re not sitting in an uncomfortable chair. Students might be able to see your unease, and you should be able to deliver your lecture without being in pain.
6 – Ensure lighting and appearance, both, are on point
Being clearly seen is super important in maintaining a professional outlook of you and your course. If you’re spending time delivering a course that explains everything properly, taking care of factors like lighting and appearance will only spruce it up.
So make sure your webcam is clean. Put on fresh and ironed clothes, brush your hair, and look the part. And finally see if where you are sitting isn’t under or over exposing your video. To give you an idea, some people start recording when they’re sitting against a window. Or over a low lamp. Don’t make that mistake.
7 – Share your screen, switch on your webcam
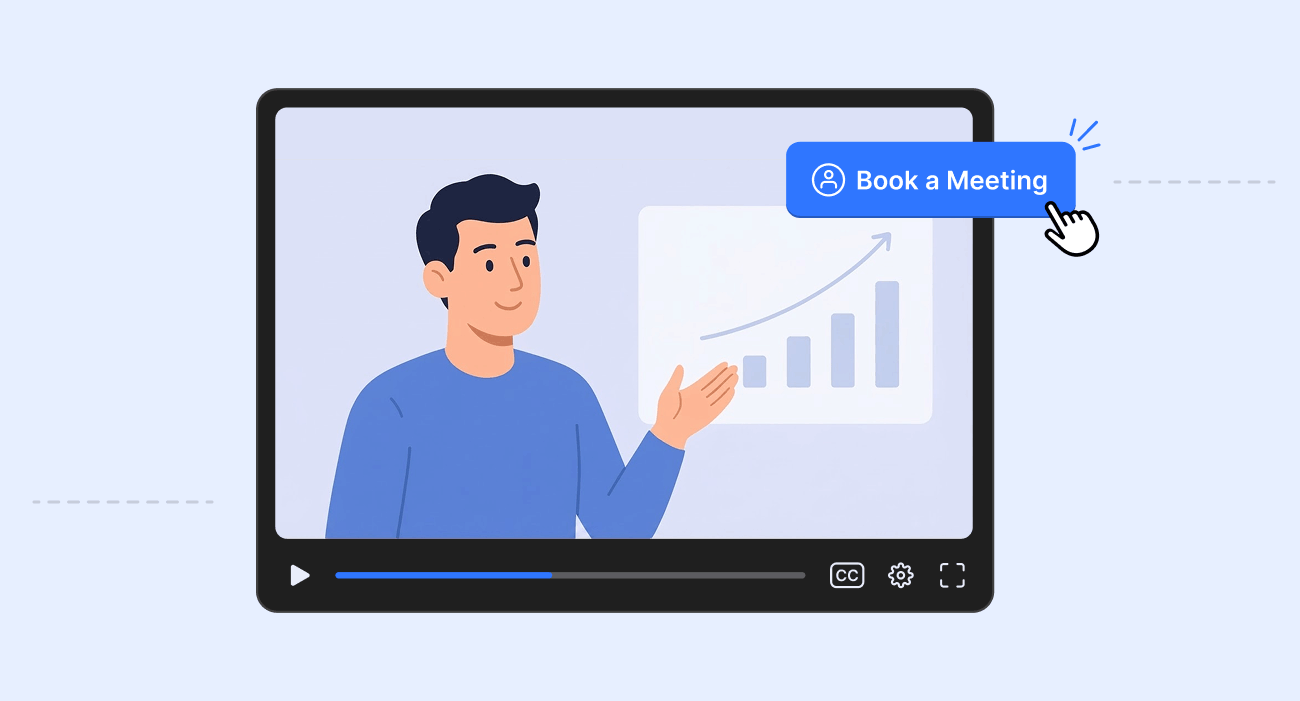
Whether you have a presentation to show or multiple things (videos, articles, images via your browser), line all of them up. The next thing to do is go to the Jumpshare application from the icons on the bottom corner of your computer. Click on the Jumpshare icon and access the video recording icon there or enter Alt+Shift+2.

Doing that will give you an option to set your screen recorder dimensions. You can extend it all the way to the corners of the screen, or capture spaces within tabs. Then compose yourself and start recording.
Keep learners engaged throughout the session by speaking into the video and using the click tracking tool to move around the webcam display. Even try drawing on the screen with the draw tool. It’s a customer favorite as it helps emphasize important information and makes courses more interactive. Discover more Jumpshare features.
For course creators it’s super important to have all their recorded lectures prepared on time. Jumpshare is able to accomplish that for them. It solves several pain points in one go. Which is why they don’t mind paying a small subscription fee.
8 – Try to keep video under 6 minutes
6.9 million video sessions were studied to find the optimal course video length, and there’s a magic number to keep learner engagement alive. It’s six minutes and under. Discuss the important stuff and get straight to the meat of the lecture or your students may skip over the ‘boring’ parts. Saves them time and saves you time.
9 – Show enthusiasm
Try to look and sound excited when teaching your course. Considering recorded lectures are not two-way lectures, they require you to keep learners attentive. Moreover, don’t try to speed through the course and speak quickly – talk in a way your students can follow what you’re saying.
Also don’t forget to take breaks. You can pause your video recordings, drink water in between, and continue with your course video.
10 – Don’t forget to make eye contact with your learners
Recorded or asynchronous courses are at higher risk of boring learners. By switching on the webcam and featuring in your videos, you are engaging the learners. But to engage them more, talk into the camera. Eye contact is an extremely important aspect of cultivating learner engagement.
Learners should be aware you are attentive, addressing them, and simultaneously commanding attention. To aid that, keep your voice high and confident, and feel free to use hand gestures to explain stuff.
Moreover, to make learners feel like they’re an active participant of your course (even though they’re not) ask questions, give them some time to think of their answers. Take pauses and give them some time to look back at what they’ve learnt.
11 – Start every video with a summary of the previous lecture, and at the end tell what’s coming next
And lastly, remember to do a recap of your previous lecture at the start of a new lecture. Line them up in your presentation and walk them through it. Doing so would reinforce older concepts. As you go forward, perhaps even use the draw tool on Jumpshare to tick mark all completed topics.
Similarly, at the end of your lecture, give them a bite of what to expect in the next lecture. Explain in summary style but have it written down for the students to follow on-screen.
After course recording
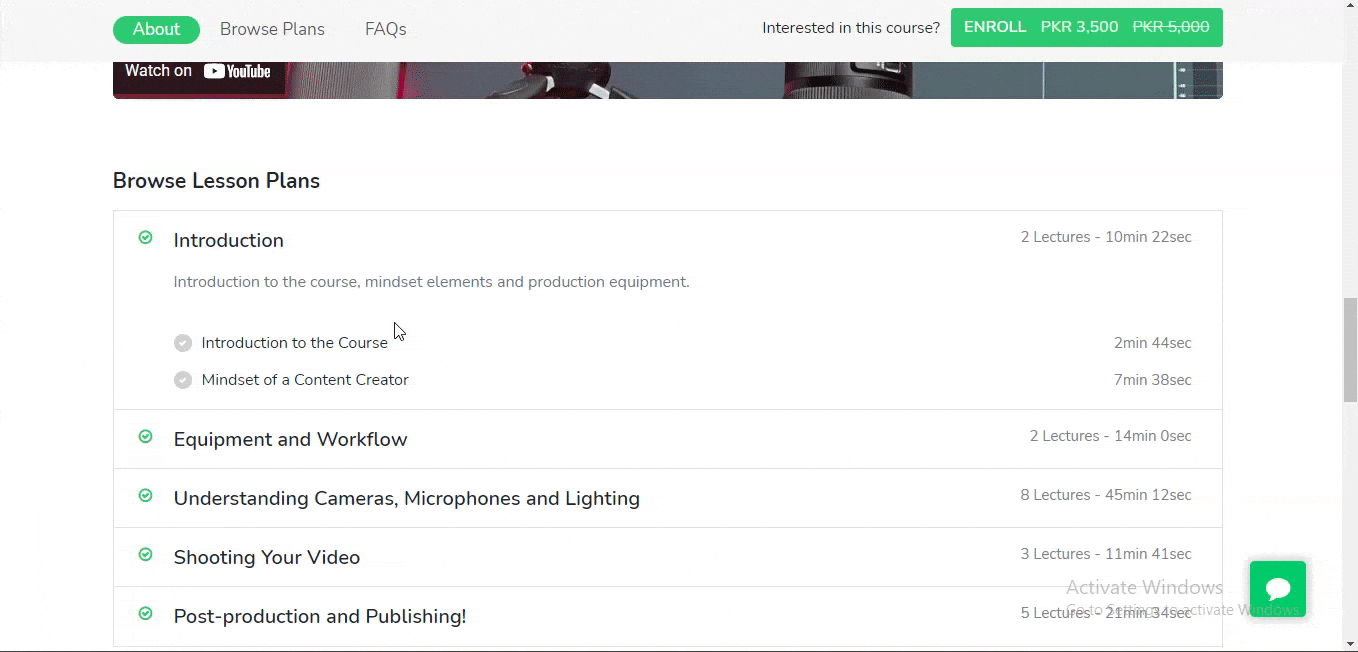
12 – Upload your screen recorded lectures to a course platform
Once you’re done recording your lectures and edits are final, there comes the question of where to upload them. Sure, you could probably try to upload them to YouTube or some streaming service where you have total control.
But if you were to do so, when your students go from 15 to 30, it’ll get difficult to track. More importantly, it would get difficult to process payments, set up landing pages, and look at analytics. That’s why, several online course hosting platforms have popped up in the past.
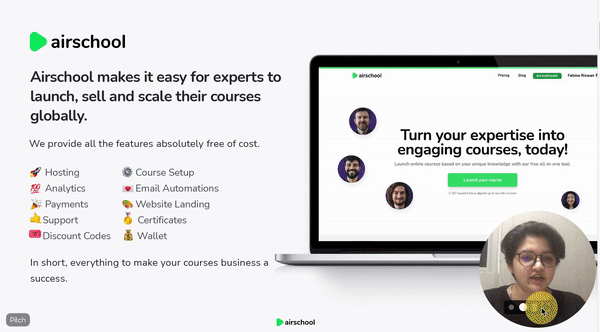
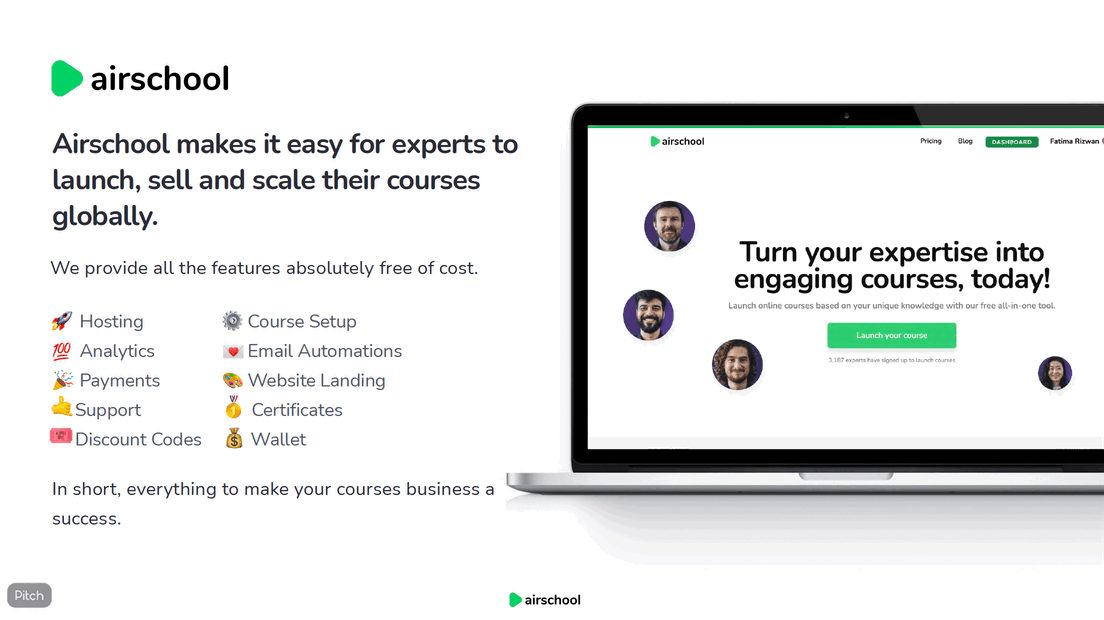
Most of the people we know of have recently shifted to Airschool. There’s a reason. Most apps like Kajabi, Thinkific, Teachable have subscription-based models, taking an average of $30 from you. The numbers can go up based on several factors and features, even up to a $1,000.
If you don’t want to splurge, be assured there are platforms like Airschool around, ones that have no subscriptions but a commission-based model. What this means is that you only give away a small portion of your sales, that too when you make a sale. That’s a win-win.
It can certainly make matters less stressful and doesn’t take money out of your pocket when you’re only just creating your course or if sales have slowed down. In the meantime you can gain access to similar, sometimes even more features available on the more popular platforms in the west.
Hoping this helps simplify how to screen record your online course. Craft a plan, download Jumpshare, shoot, and announce your knowledge product to the world. Good luck!
This is a guest blog post written by Sinwan Zahid of AirSchool.