Screen Recording
 Screenshot Capture
 GIF Capture
 File Sharing & Collaboration
 Jumpshare AI

The iPhone and its operating system, iOS, have both come a long way since Apple’s iconic smartphone line first graced the shelves over a decade and a half ago. Improving by leaps and bounds every few years, the hardware continues to blur the lines between desktop and mobile, and the software hasn’t lagged behind either. Features that were, only a few years ago, considered more a power-user’s speed or much too demanding for the iPhone’s relatively humble innards are now commonplace.
Take screen recording, for instance: it’s not the newest addition to iOS, but what you might not know is that back in what now feels like the operating system’s dark ages, you had to jump through quite a few hoops, some that voided your device’s warranty, to be able to record your iPhone’s screen. That feature is now only a few taps and swipes away. If you’re here, though, you might be having a bit of trouble finding or using it. If so, you can count on the following to guide you through the process, step by step.
Table of Contents
- How to Turn On Screen Recording on iPhone
- How to Record Your iPhone Screen
- How to Edit and Delete Screen Recordings
- How to Quickly Share iPhone Screen Recordings Anywhere
How to Turn On Screen Recording on iPhone
Before you can start recording your iPhone’s screen, you’ll have to enable the feature from within the Settings app. Here’s how.
1. Open up the Settings app.
2. Select Control Center.
3. Scroll down to find the Screen Recording option under More Controls and hit the little plus (+) icon to its left. This will add the option to the Included Shortcuts list displayed above. As the name implies, this list shows all the shortcuts displayed at the bottom of the system-wide Control Center.
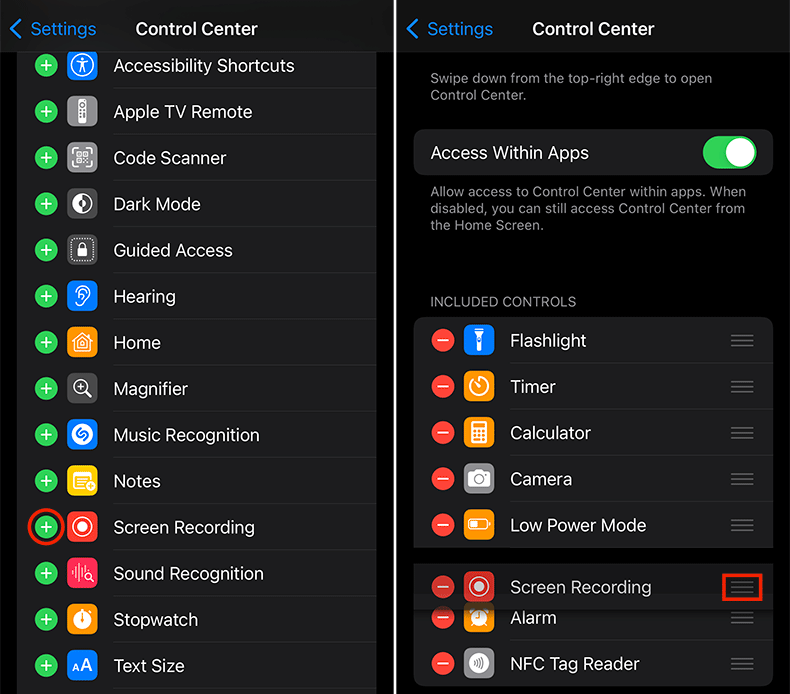
4. You can adjust the Screen Recording button’s position within said shortcuts by holding down on the three horizontal lines to its right and dragging it up or down the list.
How to Record Your iPhone Screen
The screen recording process itself only takes a couple of taps. Here’s what you need to do.
1. Set the stage for your recording. Launch the app or navigate to the part of the operating system that you want to record.
2. Hop into the Control Center by swiping down from the top-right corner of the screen.
3. At this point, you may want to select Focus followed by Do Not Disturb unless you wish to have incoming notifications appear within your recording. You can disable Do Not Disturb as soon as your recording is done.
4. Tap and hold the Screen Recording icon at the bottom of the Control Center.
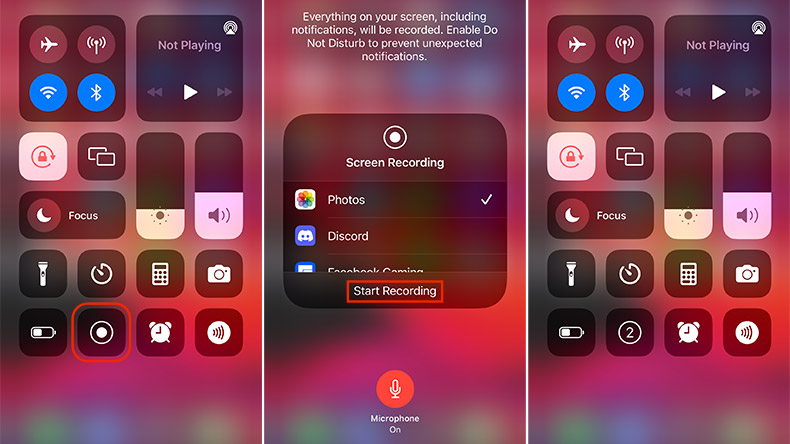
5. Ensure that the Photos app is selected from the list of displayed outputs and tap the Microphone toggle at the bottom if you wish to add a voiceover. If you decide to keep the microphone off during your recording, only system audio, such as the audio within a game, will be recorded.
6. Hit Start Recording when you’re ready. The icon will count down from three before your screen recording kicks off. This should give you enough time to swipe upwards from the bottom edge of the screen and exit out of the Control Center.
7. When you’re done recording, either tap the clock in the top-right corner of the screen followed by Stop or hop back into the Control Center and tap the Screen Recording icon once again.
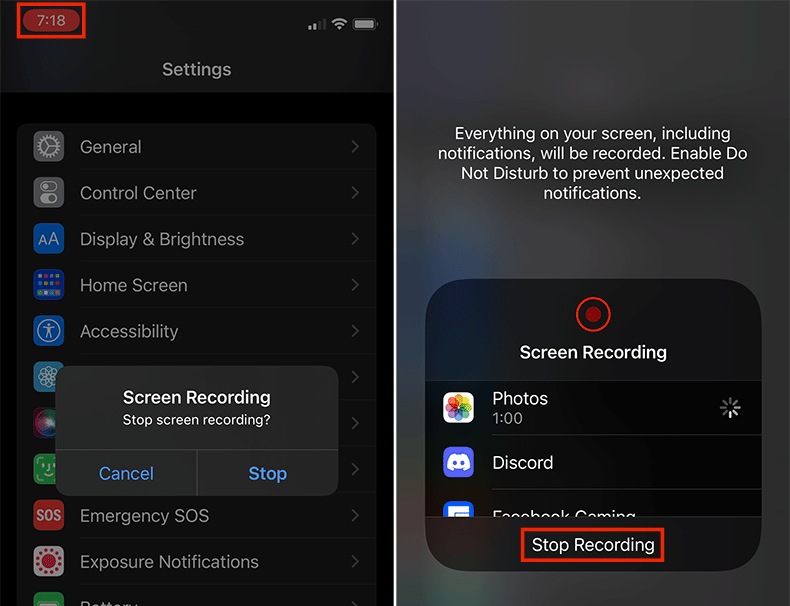
You should now see a notification at the top of the screen telling you that your recording has been saved to the Photos app. Tap this notification to instantly view, edit, delete, or share the recording.
Note that screen recording doesn’t work while you’re mirroring your screen and that certain apps will not allow you to record audio. The native Phone app and VoIP offerings such as WhatsApp, for instance, will cut your screen recordings short when hopping into a call.
How to Edit and Delete Screen Recordings
Unless you’re recording your screen for your own benefit, the process up until this point is only half the work. Before you go sharing your screen recordings with others, you might want to prune them a tad – shave off the extra bits and hide any sensitive information. Here’s how you’d go about that.
1. Launch the Photos app.
2. Switch to the Library tab and select the All Photos option at the bottom. Your new screen recording should be at the bottom of this gallery.
3. Select your screen recording to begin playing it. If you’re unhappy with the recording, you may hit the trashcan icon in the bottom-right corner to delete it.
4. To make basic changes to the video, tap the Edit option in the top-right corner.
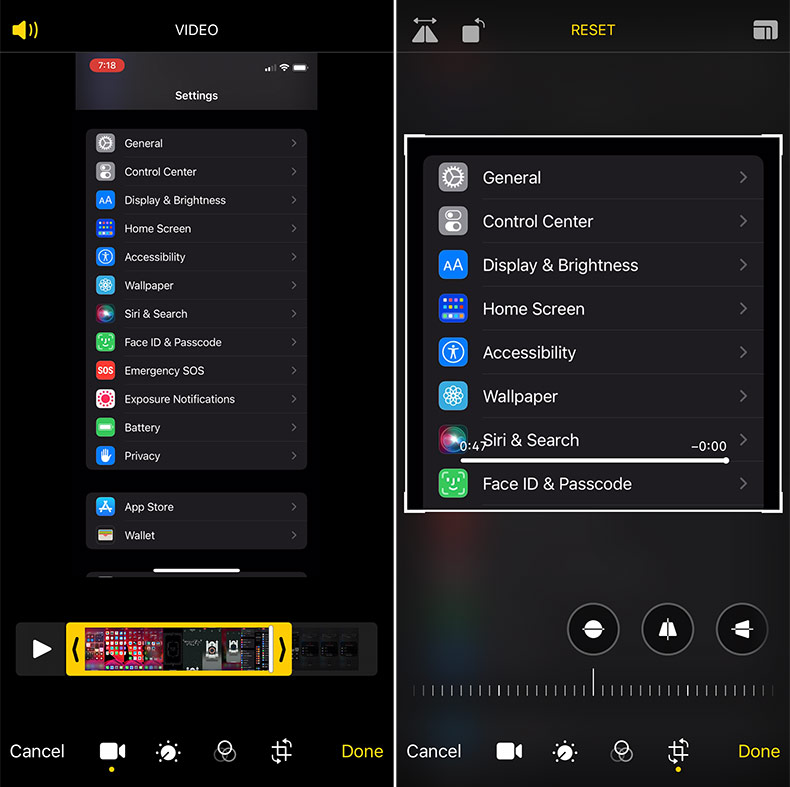
5. Within the screen that follows, you can make the following edits to your recording by switching between the four options displayed at the bottom:
- Select the portion of the video that you’d like to keep and choose to mute the audio by hitting the toggle in the top-left corner
- Adjust the brightness, contrast, saturation, and several other aspects of image quality
- Add a filter
- Crop, rotate, tilt, and flip the video as well as choose from a selection of aspect ratios (such as Square and 16:9) suited for different platforms
6. When you’re happy with your adjustments, hit Done followed by Save Video as New Clip or Save Video. The latter will overwrite the original video.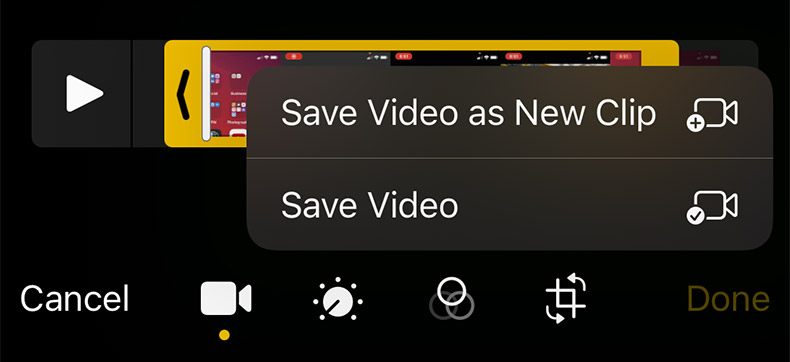
How to Quickly Share iPhone Screen Recordings Anywhere
Now that you’re done preparing your video for public consumption, it’s time you shared it. If you already have a specific destination and method in mind, you may skip this portion of the guide. If, however, you’re looking for a convenient, lightning-fast way to get your video to your target audience, no matter the medium, we have just the solution for you.
Upload your video recording to the Jumpshare iPhone app and a link to it will be instantly copied to your clipboard, ready to be shared anywhere. The sharing process is seamless in that once you’ve signed up for a free Jumpshare account, you needn’t even open the app. Here’s how it works.
1. After Jumpshare is installed, launch it and sign in, or sign up for a new account if you don’t already have one.
2. Launch the Photos app and select a screen recording.
3. Hit the Share icon in the bottom-left corner and select Jumpshare from the carousel of apps in the menu that pops up. This will begin uploading the app to your Jumpshare library and automatically copy its link to your clipboard as soon as the upload is complete.
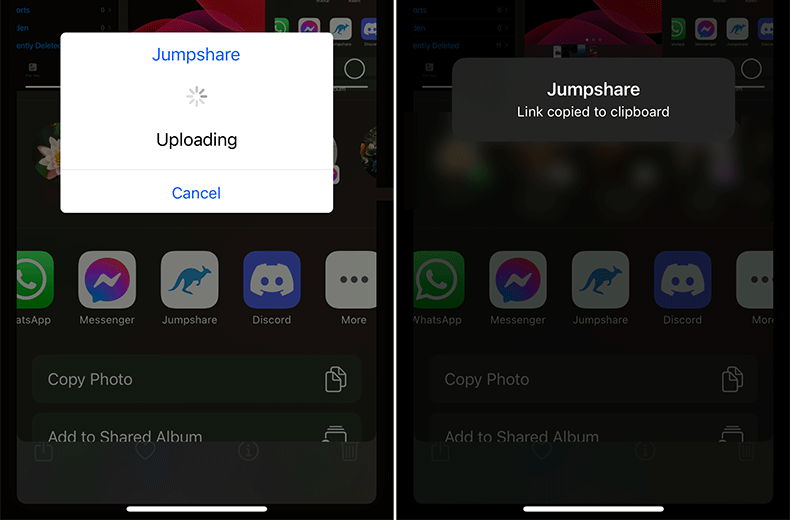
4. You can now paste this link wherever you mean to share the recording. The link will play the screen recording within Jumpshare’s online viewer. Recipients may even add comments on this page and choose to download the recording to their devices.
On your end, the same page will also display the number of times the recording has been viewed and downloaded.