Screen Recording
 Screenshot Capture
 GIF Capture
 File Sharing & Collaboration
 Jumpshare AI
As excellent an exercise taking notes is for organizing your thoughts, it isn’t exactly the least time-consuming. If you find yourself spending way too much time in a note-taking app or with a pen and paper, it may be time to consider switching to voice memos. These aren’t likely to replace good old textual notes for you entirely, of course – the latter is undoubtedly easier to review, after all.
Audio recording has its own set of pros, though. It’s more convenient than tapping away endlessly on a virtual keyboard, for starters, and a more natural way to communicate, which makes it indispensable when sharing your thoughts with others. It’s why almost every major instant messaging app out there has voice messages baked into it, but what if you wanted to create your own private collection of audio notes to listen to or share as and when needed? The iPhone offers a set of features that let you do just that.
In what follows, we walk you through how to record your voice on the iPhone using the native Voice Memos app and share audio recordings anywhere over the web using Jumpshare.
Table of Contents
- How to Record Voice on iPhone
- How to Edit Recorded Audio
- How to Delete Voice Recordings
- How to Organize Voice Memos into Folders
- How to Share Voice Recordings on iPhone
How to Record Voice on iPhone
As we mentioned earlier, the iPhone comes packed with its very own voice recorder app called Voice Memos. You should be able to see it on the home screen. If not, pull down anywhere around the center of the home screen to hop into Spotlight, enter the name of the app into the search bar at the top, then follow the steps laid out below.
1. Launch the Voice Memos app.
2. If you’re launching the app for the first time, it should automatically take you to the All Recordings screen. Hit the round red button at the bottom here to start recording audio.
3. The app will assign a placeholder title to the recording based on your current location. You can edit this name while you’re still recording by tapping it once.
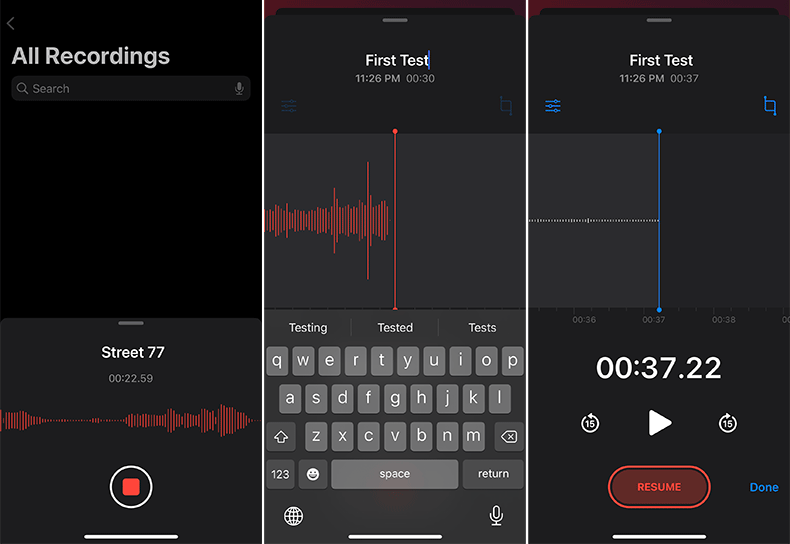
4. Tap the area immediately below the title to pause and edit the recording itself. Tap the Trim icon in the top-right corner to shave away parts of the recording you don’t need or swipe across the timeline in the middle and hit the Resume button below to record over any part of the audio.
5. Once you’ve said your piece, hit the stop button at the bottom to save the voice memo.
The completed recording should now appear on the same screen, ready to be played. Tap the Options icon in the bottom-right corner of the recording to choose your favored playback options.
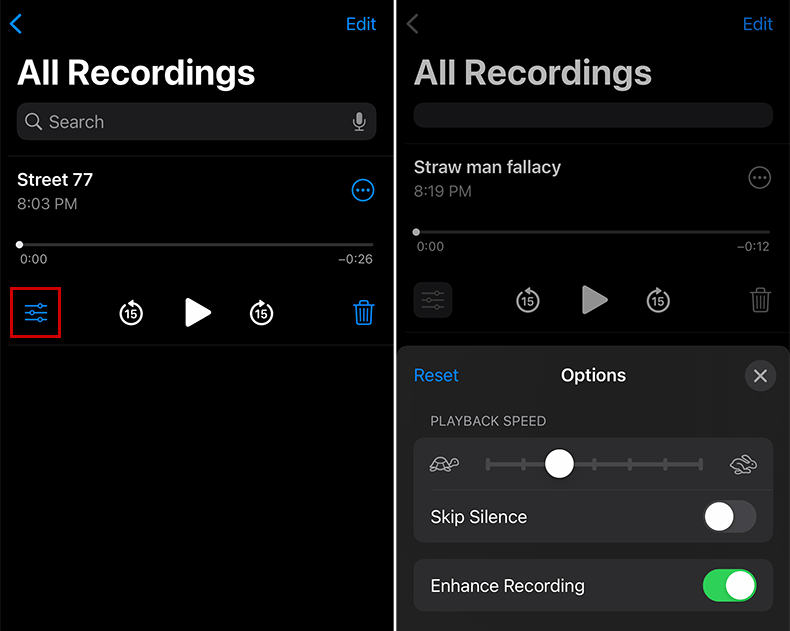
You can select one of seven playback speeds, set the app to automatically skip silent parts of the recording, or reduce background noise with the Enhance Recording toggle.
How to Edit Recorded Audio
We’ve already covered how you can edit the title of a recording or adjust how it’s played within the app. The following explains how to edit the audio content itself.
1. Select a recording, then tap the More Actions (…) icon to its right.
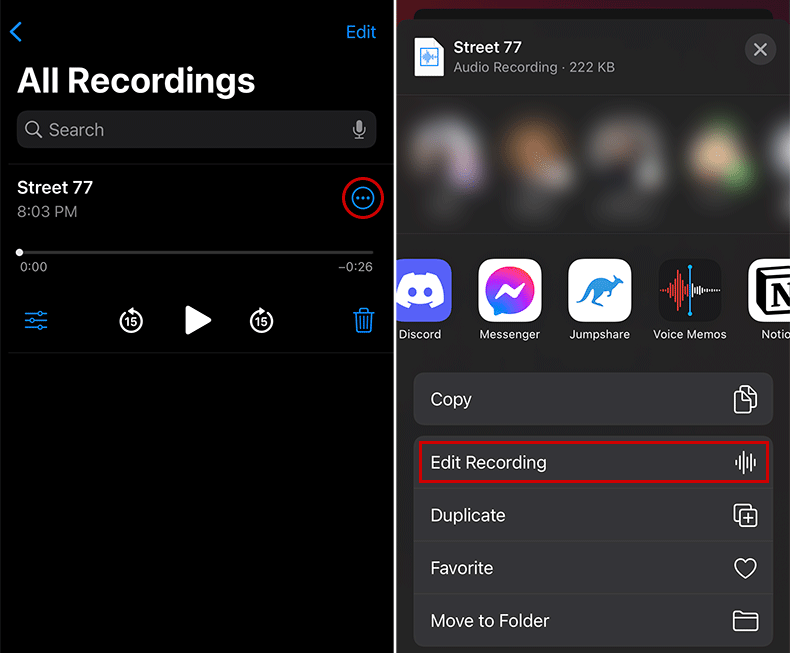
2. From the menu that pops up, select Edit Recording.
3. The Replace button at the bottom of the screen that follows lets you record over any part of the recording or resume recording from the end. You can choose where you begin recording by swiping left or right across the timeline displayed in the center.
4. As before, the Options icon, this time visible in the top-left corner of the screen, lets you change the playback speed, set the app to automatically skip silent portions, and reduce background noise.
5. The Trim icon in the top-right corner allows you to select the portion of the recording you want to either keep or delete. To make a quick selection of a portion of the recording to trim or delete, drag the handles at either end of the timeline displayed at the bottom of the Trim screen. For a more accurate selection, you may want to use the magnified timeline in the center.

Swipe left or right across the timeline and hit the Play button to listen to your selection. Hit Trim or Delete once you’re happy with it. You can now continue to edit the recording further or hit the Save button if you’re done.
5. Back on the editing screen, hit Done to save all changes.
Note that you can choose to Duplicate a recording (from the More Actions menu mentioned in step 1) before you edit it if you’d rather keep a copy of the original.
How to Delete Voice Recordings
To delete a single voice recording, tap it or swipe left across it, then hit the trash icon that appears to its right.
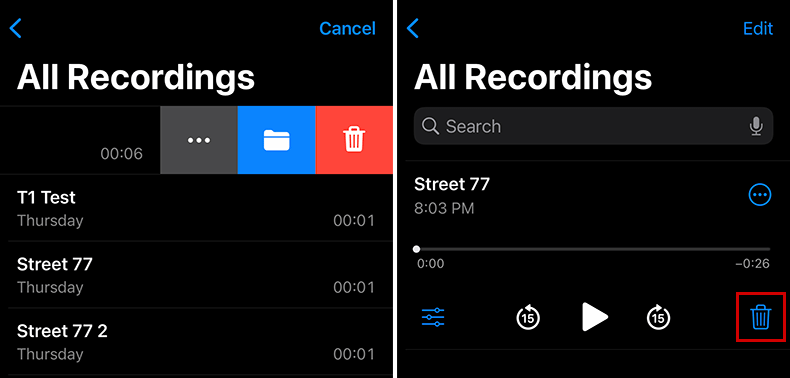
Multiple voice memos can be deleted at once by hitting the Edit button in the top-right corner of the All Recordings screen or a folder, selecting however many recordings you want to delete, and tapping the Delete icon in the bottom-right corner.
Note that deleted recordings are always first sent to a recycle bin. To recover these files or delete them permanently, back out of All Recordings to the main screen, select Recently Deleted, and proceed to remove or recover files individually or in bulk.

How to Organize Voice Memos into Folders
As the recordings pile up, you will eventually begin to have trouble finding individual memos in the All Recordings list. Fortunately, Apple’s voice recorder lets you organize your collection into custom folders. Here’s how that works.
1. Hit the Back icon in the top-left corner of the All Recordings screen. This will take you to the app’s main screen.
2. Tap the folder icon in the bottom-right corner, enter a name of choice, and hit Save.
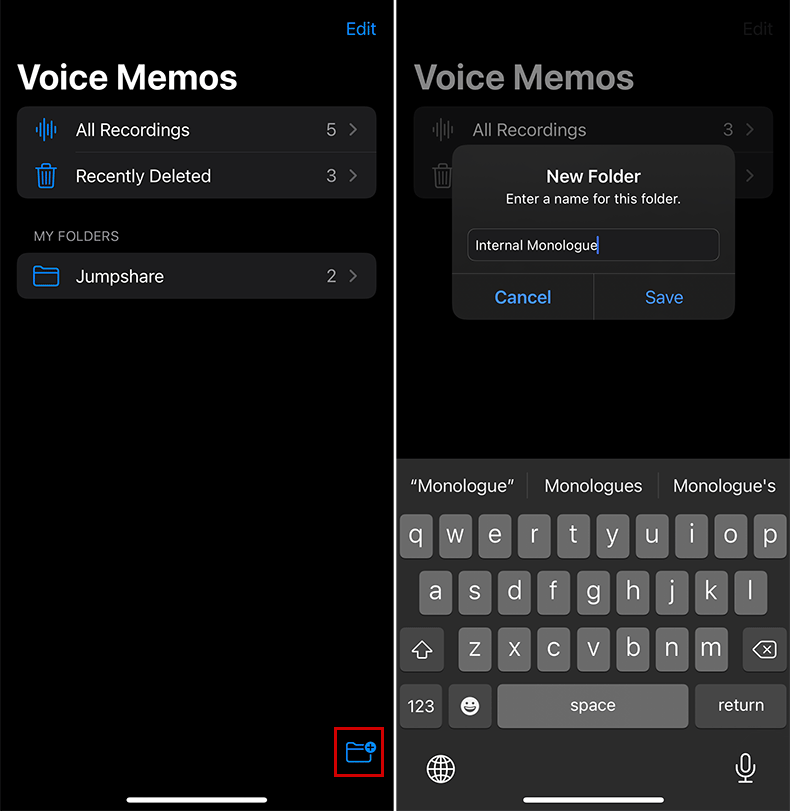
3. Your new folder will appear under a new My Folders section on the same screen. You can now hop into this folder and add new recordings directly to it.
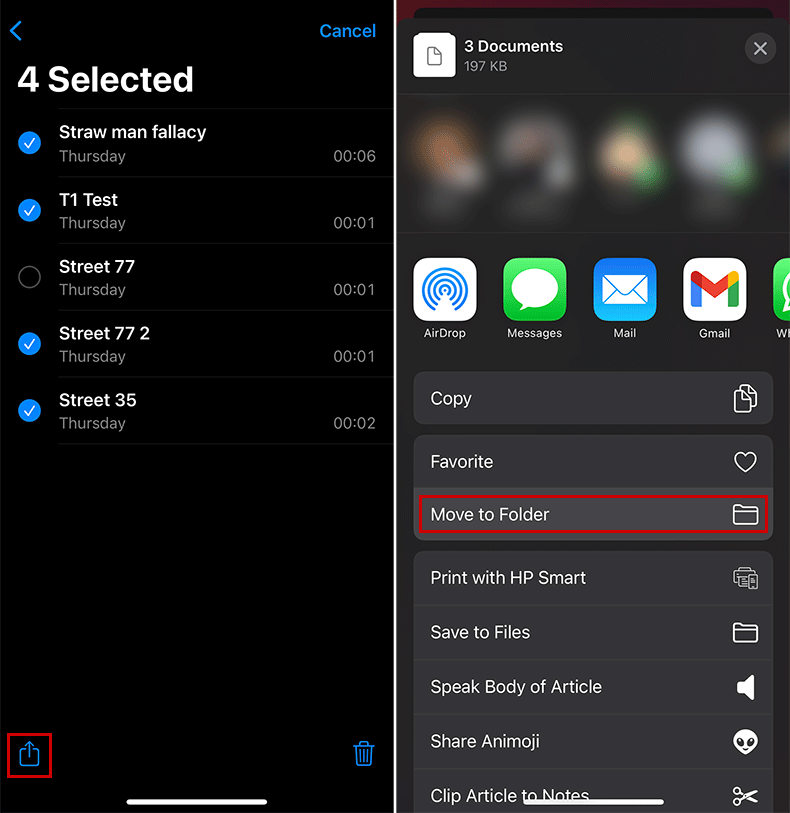
4. To move existing recordings to this folder, open up All Recordings, swipe left across individual files, tap the folder icon, and select your folder of choice from the list. You can move files in bulk as well, of course. Simply hit the Edit button in the top-right corner, select all the files you wish to move, tap the Share icon in the bottom-left corner, pull up on the menu that appears, and select Move to Folder. Files you move to a folder are not removed from the All Recordings view.
Any folders you create can be renamed, deleted, or reordered in the list. Hit the Edit button in the top-right corner of the main screen to do so. Note that deleting a folder will also delete all of the recordings present in it. You can, however, recover these files from the Recently Deleted section.

You can also swipe rightwards across a recording to add it to the Favorites folder, displayed under All Recordings on the main screen.
How to Share Voice Recordings on iPhone
The iPhone offers voice messaging as part of the native Messages app, but these recordings aren’t the easiest to edit or share given the audio format.
The Voice Memos app, on the other hand, has editing built right into it and it records in an audio format recognized by most major platforms. What’s more, if you share the app’s recordings through Jumpshare, you will never have to worry about where your files are being viewed.
Jumpshare boasts lightning speed sharing and its online file viewer supports over 200 formats, including the .m4a format that Voice Memos records in. Here’s how to share audio recordings with Jumpshare.
1. Download Jumpshare from the App Store.
2. Launch the app and sign up for a Jumpshare account, or sign in if you already have one.
3. Open up the Voice Memos app and hop into the All Recordings section or any other folder of choice.
4. Select a recording and hit the More Actions (…) button to its right.
5. Select Share from the menu that pops up.

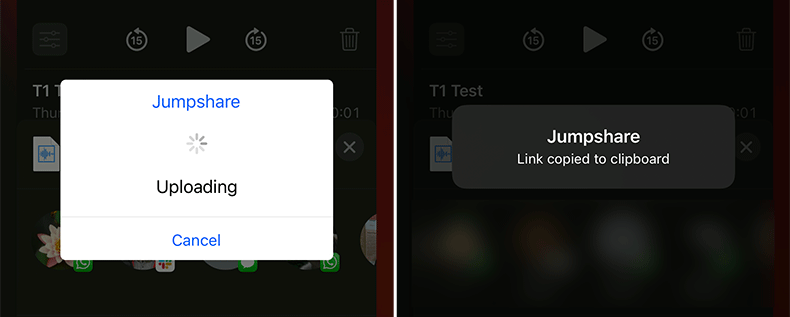
6. Select Jumpshare from the apps displayed within the menu that follows. This will upload the recording to your Jumpshare library and automatically copy its link to your clipboard.
7. You can now use this link to share your recording through your medium of choice, be it a messaging app, social media, or email.
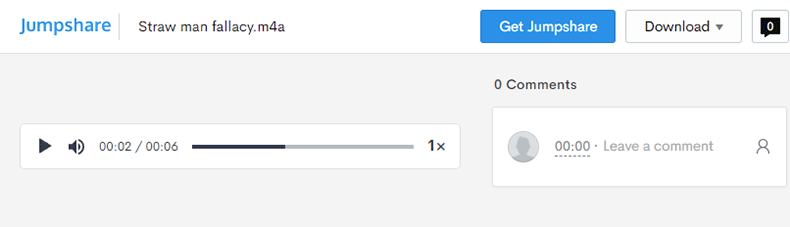
Your recipients won’t need any additional apps on their end. Tapping the link will allow them to listen to the recording within the Jumpshare online file viewer, choosing one of six playback speeds, or download the recording to their device.
Uploading your recordings to Jumpshare also ensures that they will always be just a few taps or clicks away whether you are on your phone, tablet, or computer. Jumpshare has desktop apps for both Mac and Windows, with built-in audio recording to boot, so you can continue adding to your collection of voice memos and sharing across platforms with ease.
If you find yourself in a situation where you’re required to both show and tell, however, you may want to go a step further and consider recording a video. To help you with that, we have a separate guide that explores how you can record your iPhone screen and instantly share the result via Jumpshare. On PC or Mac, you may use the Jumpshare’s desktop app’s built-in screen recorder to capture a portion or the entirety of your computer’s screen at up to 4K resolution, and even choose to have it overlayed with video from your webcam. Once you’re done recording, the video is automatically uploaded to Jumpshare and a link to it is copied to your clipboard, ready to be shared. The entire process takes no more than a couple of clicks.
Go ahead and try recording and sharing a few voice memos on your iPhone, and if at any point you feel like you’re missing a step, you can always return to this guide for a refresher. and instantly share the result.